
Add email accounts that automatically forward email to Conexiom, removing the need for team members to forward them manually.
Adding an Email Account
To add accounts that automatically forward email to Conexiom, follow these steps:
-
In the left navigation rail, click the Settings icon, to open Settings.
-
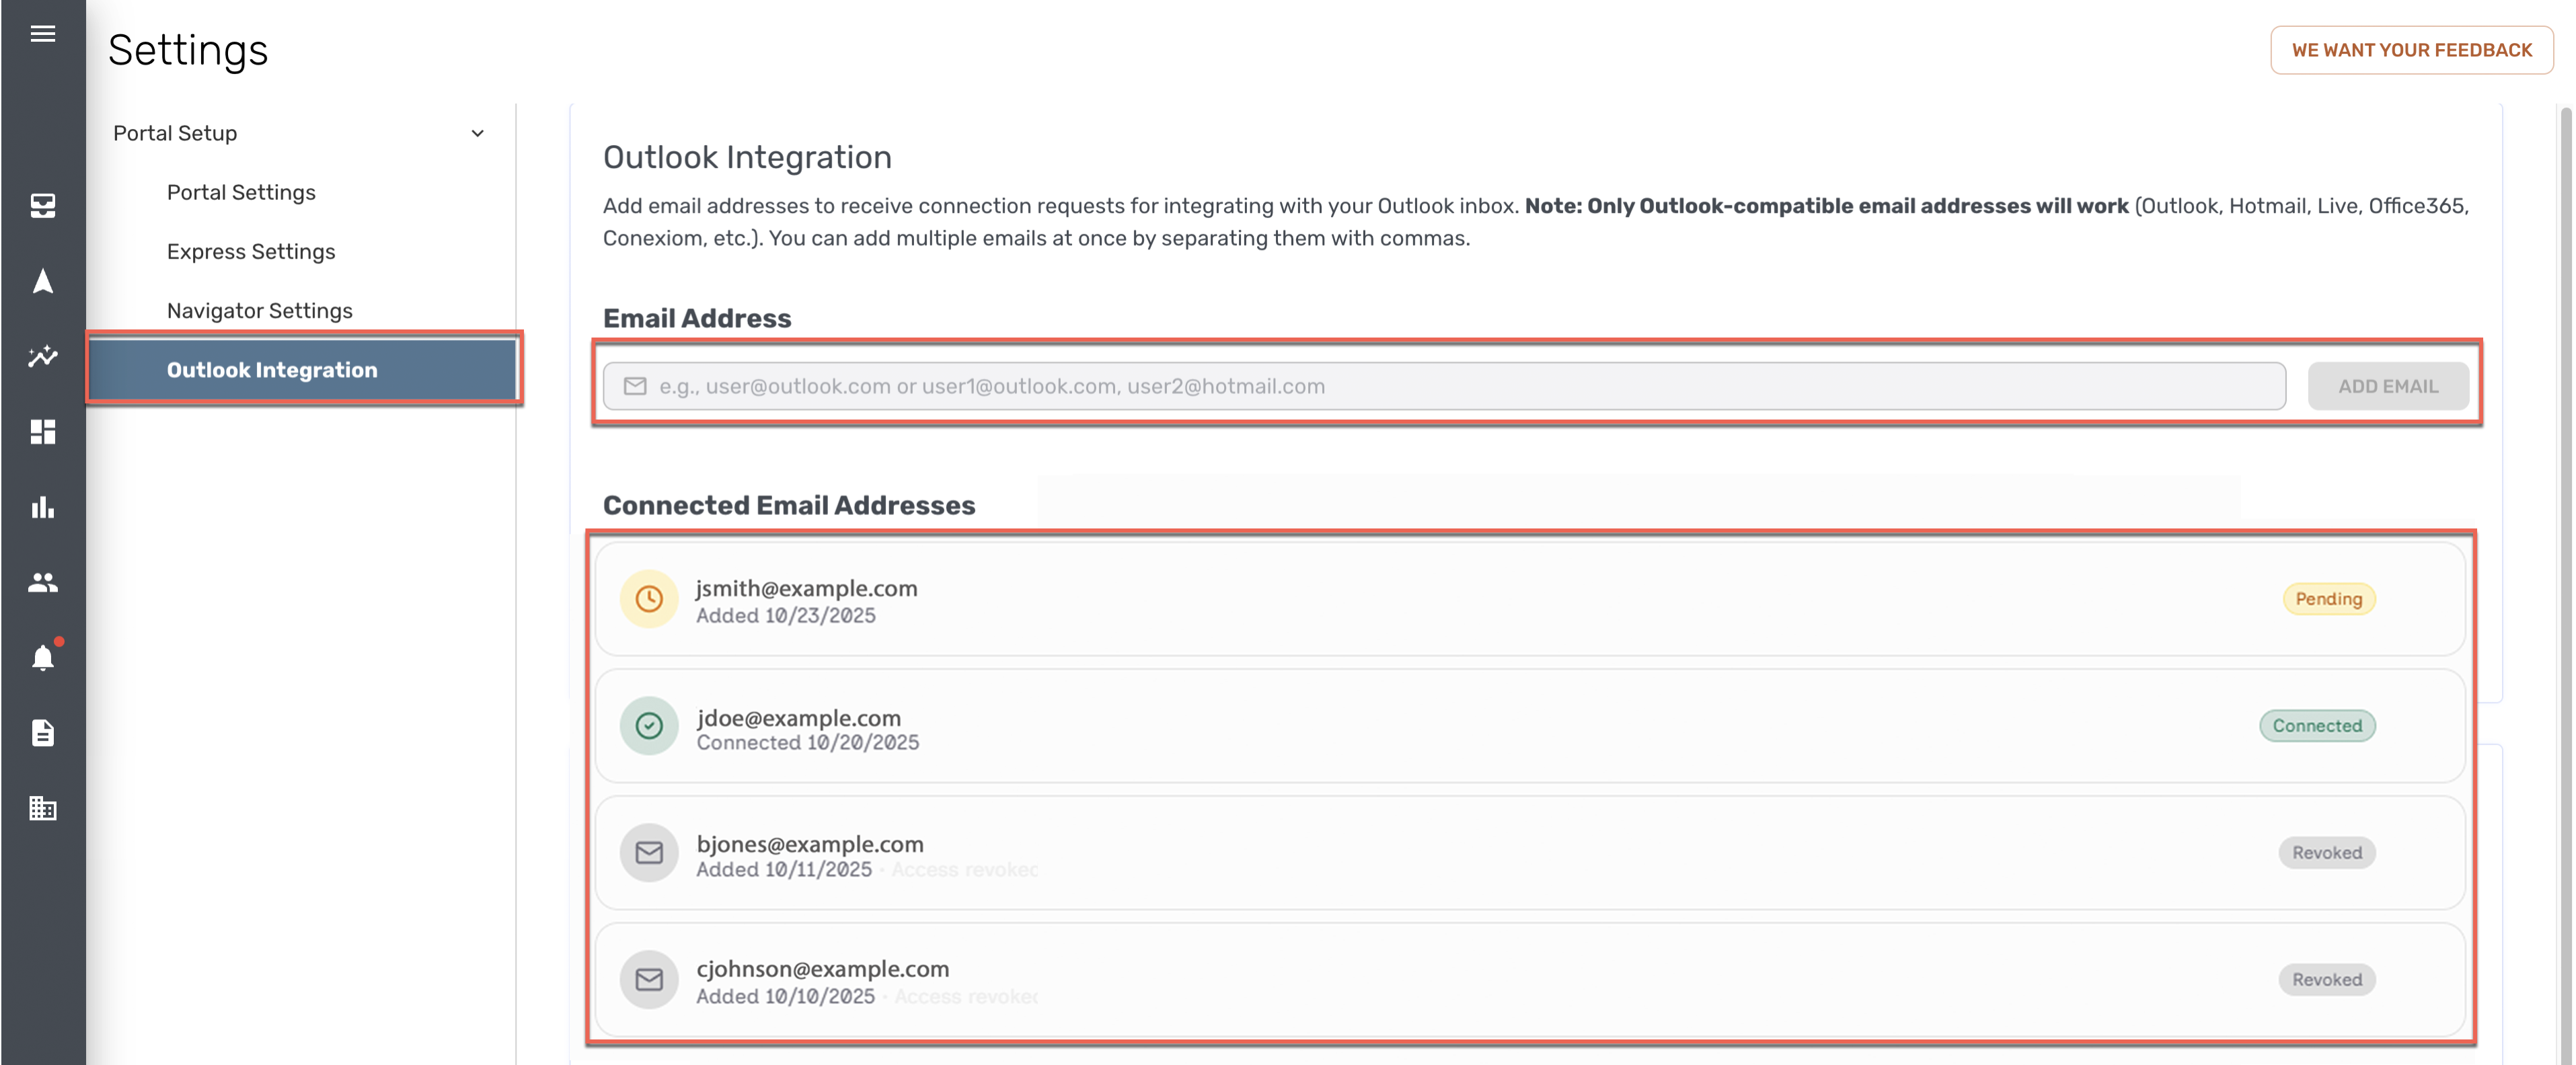
Click Email Integration. The Email Integration Settings page displays.
-
In the Email Address field, enter the email addresses you want the system will listen for. For example, enter “example-name@example.com.” A Connection Request is then sent to that address. You can enter multiple addresses if you enter a comma and a space between each address. For example, enter “example1-name@example.com, example-name2@example.com, example3-name@example.com.”
Note: Currently Outlook-compatible email addresses will work. These include addresses from Outlook, Hotmail Live, Office 365, as well as Conexiom email addresses. -
Click Add Email. Under Connected Email Addresses, a listing of the email address is displayed. (See the image “Email Integration, Email Addresses,“ above.)
When the recipient responds to the connection request in their email inbox, the status reads as “Connected.” If the recipient does not receive the Connection Request, click Resend Email in that listing.
Email Processing Behavior
After configuring filters, when integration is complete, appropriate order-related emails to that address will be automatically detected and forwarded to Conexiom.
Each email will be clearly labeled in the inbox as one of the following:
-
Sent to Conexiom
-
Not Sent to Conexiom
Following are two examples for the inbox of the fictional user, “Webtest Guy.”
a.png?cb=96c1a6b1c2e938f078139184028562ec)
If the document is sent to Conexiom but encounters an issue during processing, a listing will display in either with a “Not Processed” status or it will trigger an alert that requires review.
d.png?cb=eb53b1c7497db282f24c41777bb1ecfe)
Note: The above are fictional, example email messages. Your emails should look similar to them, but may not be identical in every way due to differences in your organization’s system preferences and settings.
Deleting an Email Account
To remove an email account from Email Integration:
-
Navigate to Settings > Email Integration.
-
Under Connected Email Addresses, hover over the email address you want to remove.
-
Click the trash can icon that appears next to the email address.
The email account is removed immediately and will no longer forward messages to Conexiom.
