
The first step in configuring a new trading partner is to add an account.
Trading Partners need to be added to the system as an account and then they need to be configured with specific information. After initial configuration, you may need to intermittently add or change information as a matter of good management. Relevant articles follow:
Setting up Documents in Configuration Studio
Managing Trading Partners after Initial Configuration
Before You Begin
If you are using First Pass Mapping, please click here.
If you have a customer (or vendor) list to add that exceeds five new trading partners, click here.
How to Add a New Trading Partner Instructions
To add a new trading partner profile by using text, do the following:
-
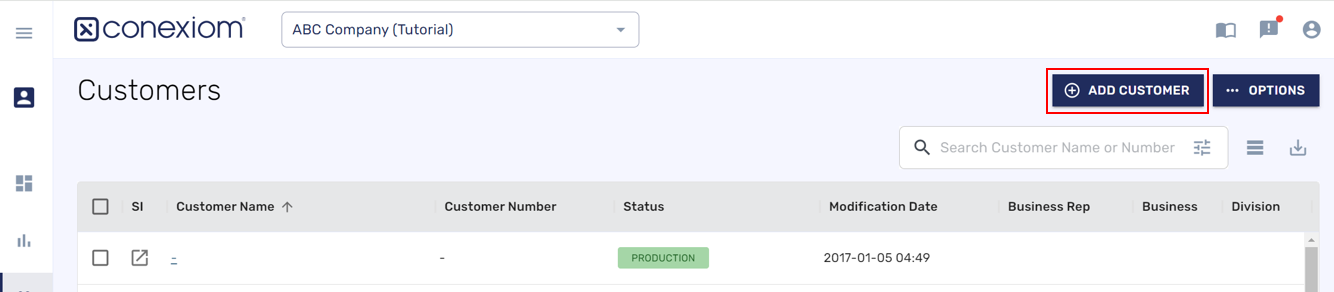
Navigate to the Customers (or Vendors) tab from the left-hand side bar.
-
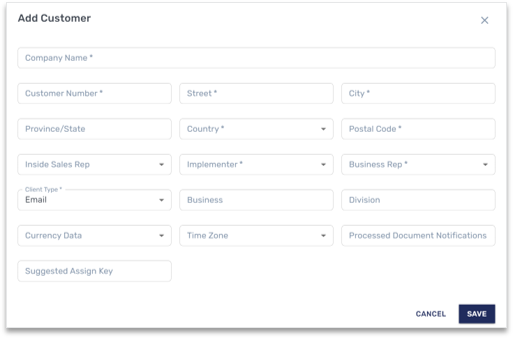
In the top right corner of your screen, click Add Customer. The Add Customer dialog displays.
-
Populate fields with the requested information. Fields marked with an asterisk (*) are mandatory.
|
Field Name |
Information to Input |
|---|---|
|
Company Name |
Account name: should be unique to the customer/vendor and will show in the portal. |
|
Customer / Vendor Number |
Account number or identifier: must be unique to the customer/vendor. This is often the customer number as it appears in your ERP. |
|
Address Fields (Street, City, Province/State, Country, Postal Code) |
Primary Billing or Shipping address.
Note: Unless otherwise set by business rules, entering "N/A" under the conditions described above does not impact mapping nor the information sent to the ERP. |
|
Business Division |
Optional fields that will allow you to sort the Customer List more effectively, separate reporting in the dashboard or limit user access to trading partners if entered consistently. |
|
Inside Sales Implementer Business Representative |
These are the three roles you can assign to this customer. For more information on the differences between these roles, click here.
|
|
Currency |
Select a currency, such as US Dollar ($) - USD. Unless otherwise set by business rules, this setting relates to reports available in the dashboard. |
|
Time Zone |
Select the time zone, such as (UTC-6:00) Central Time (US & Canada). This setting relates to reports available in the dashboard; it does not affect values sent to the ERP. |
|
Client Type |
Select Email. (No other option is available at this time). |
|
Processed Document Notifications |
This is the email addresses where successfully processed order notifications from Conexiom are sent. For multiple emails, separate each address with a semicolon (;). Recipients do not need to have access to the portal. This field is not mandatory at time of Customer creation, but is mandatory at the time of moving to production. |
|
Suggested Assign Key |
For complete instructions on defining assign keys, see Creating Assign Keys. |
-
Click Save.
-
Click to download the Quick Reference Guide on how to add a trading partner [Part 1]
-
Click to download the Quick Reference Guide on how to add a trading partner [Part 2]
![Quick Reference Guide on how to add a trading partner [Part 1]](https://24432114.fs1.hubspotusercontent-na1.net/hubfs/24432114/KnowledgeBase/QRCs/QRC%20AddCustomer1.jpg)