
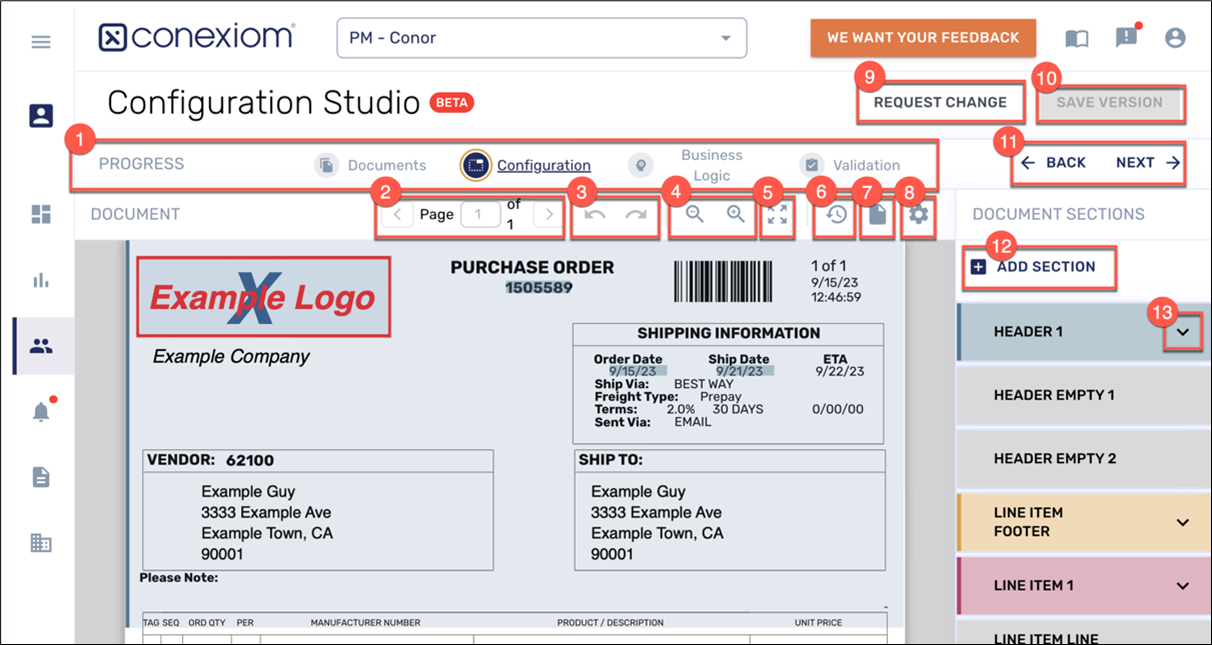
The Configuration Screen contains controls and features to help you refine the configuration profile for the document.
Using Features on the Configuration Screen
The different sections of the Configuration Screen are described below.
Periphery Controls
There are a number of controls on the periphery of the Configuration Screen. Those controls are described in the table below by the corresponding number in the image.
|
1 |
Configuration Progress Bar To progress through the configuration process, click the appropriate buttons on the progress bar: Documents, Configuration, Business Logic, and Validation. (See Configuration Overview). |
|
2 |
Changing Pages in a Document In a multipage document, you can change from the first page to any subsequent page. Click the Right Arrow next to the Page Control or enter a page number in the field. Click the Left Page Arrow to return. |
|
3 |
Undo and Redo Click Left Curved Arrow to undo and action, when available. Click Right Curved Arrow to redo and action if you have used the Left Curved Arrow to undo it. |
|
4 |
Zoom in and Zoom Out To change the size of the characters and images on your screen, click on the Magnifying Glass icon with either the Plus Sign icon (+) or the Minus Sign icon (-). To expand the application screen to fill your entire monitor screen, click Full Screen icon. The screen behaves according to your selection. |
|
5 |
Full Screen To expand the application screen to fill your entire monitor screen, click Full Screen icon. The screen behaves according to your selection. |
|
6 |
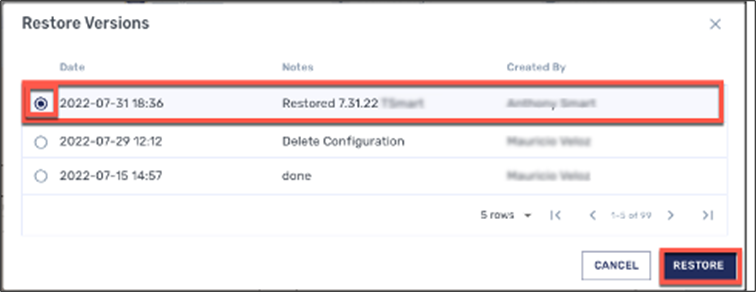
Restore a Version of the Configurations Profile Restore previous versions of your work. When you have made changes to a configuration profile, but then decide you don’t want the changes, you can restore a previously saved version. To do so, follow these steps:
|
|
7 |
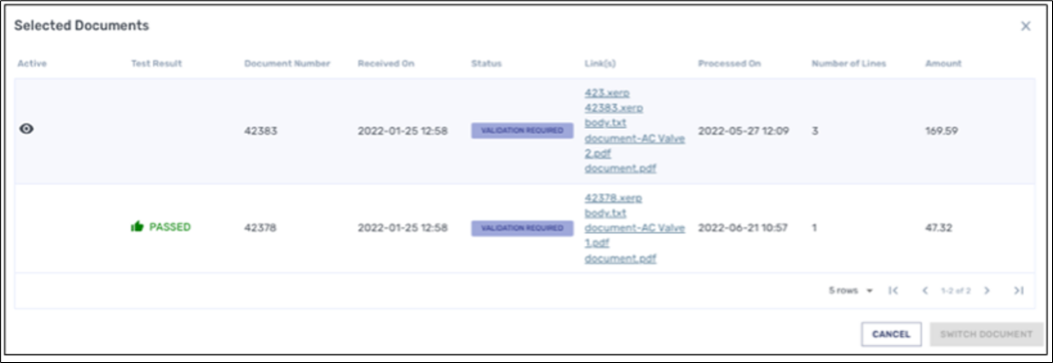
Viewing and Switching Selected Documents Click the Documents icon to view and switch selected documents. From the Selected Documents dialog, you can see what documents you have selected to work with and which ones have passed, based on the green Passed icon (). You can also switch what document to work on. In order to submit changes, all documents that you have selected need to have passed.
|
|
8 |
Settings: Selecting Basic Options Click the Gear icon in the Tool Bar at the top of your screen and you can select from these basic choices: Apply Template Apply the template of a previous document to a new one. Follow these steps:
Re-run AI, Commit Version starting the AI prediction process over from the beginning. This will eliminate any changes you have made unless you have saved that version of the document. Delete Configuration to eliminate the current configuration profile entirely, meaning that it will have no defined sections or fields. Show/Hide Unused Fields to either show or hide fields that are not being used. |
|
9 |
Requesting Changes When you discover that your configuration profile requires a task that you are not able to perform, you can enter a Change Request that your Conexiom team will perform for you.
Follow the instructions for the method you choose. Other Guidelines for Change Requests (See also Guidelines for Change Requests)
|
|
10 |
Save Version Click Save Version to save the current version of the configuration. This enables you to restore the version later if make subsequent changes that you don’t prefer. |
|
11 |
Switching Documents Click Back or Next to move through your documents, from the one you previously viewed to the next one, as ordered by the Documents table listing on the Documents page. |
|
12 |
Add Section Click +Add Section to add a new section to the document. (See Creating and Modifying Sections). |
|
13 |
Open Section Tab Arrow Click to open the tab to display all of the fields within that section. For example, click the Header tab to display listings of all of the fields within the header, including Document Date, Bill To Address, Ship To Address, and all others. |
Document Preview & Corresponding Sections
When you navigate to the Configuration screen, Conexiom’s AI creates an initial map of the first document you selected. This map displays in different sections that are shaded in different colors.
Your screen defaults to a standard set of colors, but you can select new ones at any time. (See Changing Colors of a Selection).
Each section defines where to find different types of field information, which is the important data that needs to be processed. The sections determine the type of field information and whether it will be repeated. For example, a company’s name and address information in the Header section is displayed only once, but many rows of product information can be listed in the Line-Item section.
To the right of the main screen, a panel displays rectangular boxes with listings that correspond to the sections of the main document, in the same color as the section. Click the arrow in the upper right of a rectangular box to open the tab and see the fields listed.
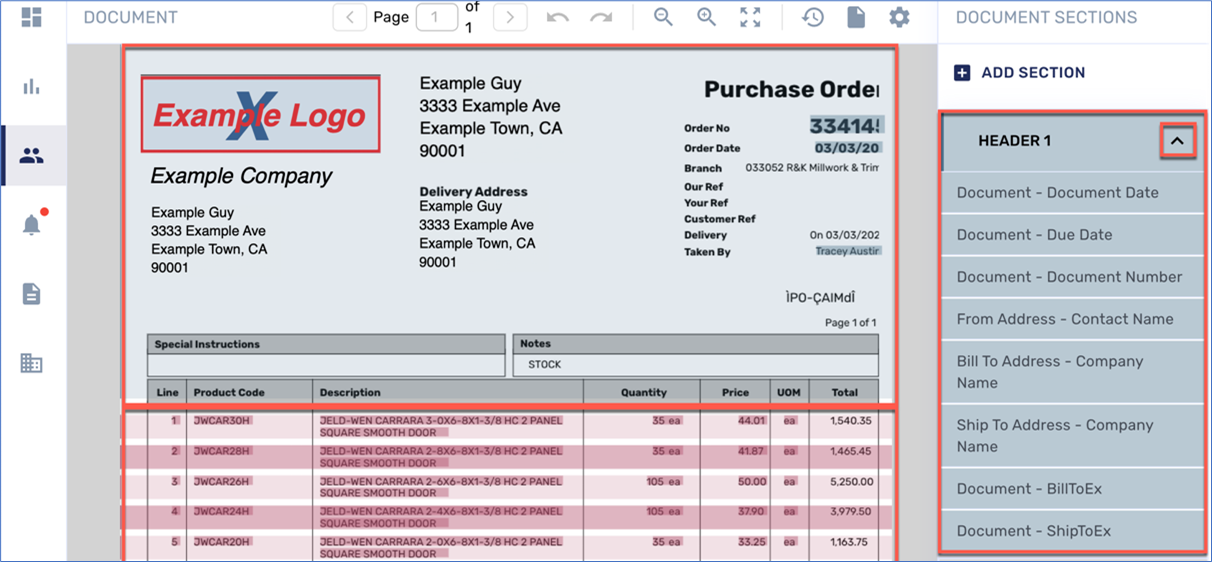
In the example, in the Header 1 section, you can see eight fields, each of which are listed in the corresponding panel on the right, including Document Date, Due Date, Document Number, and five others. When you click on a field on the right, it highlights the same field on the left and vice versa.
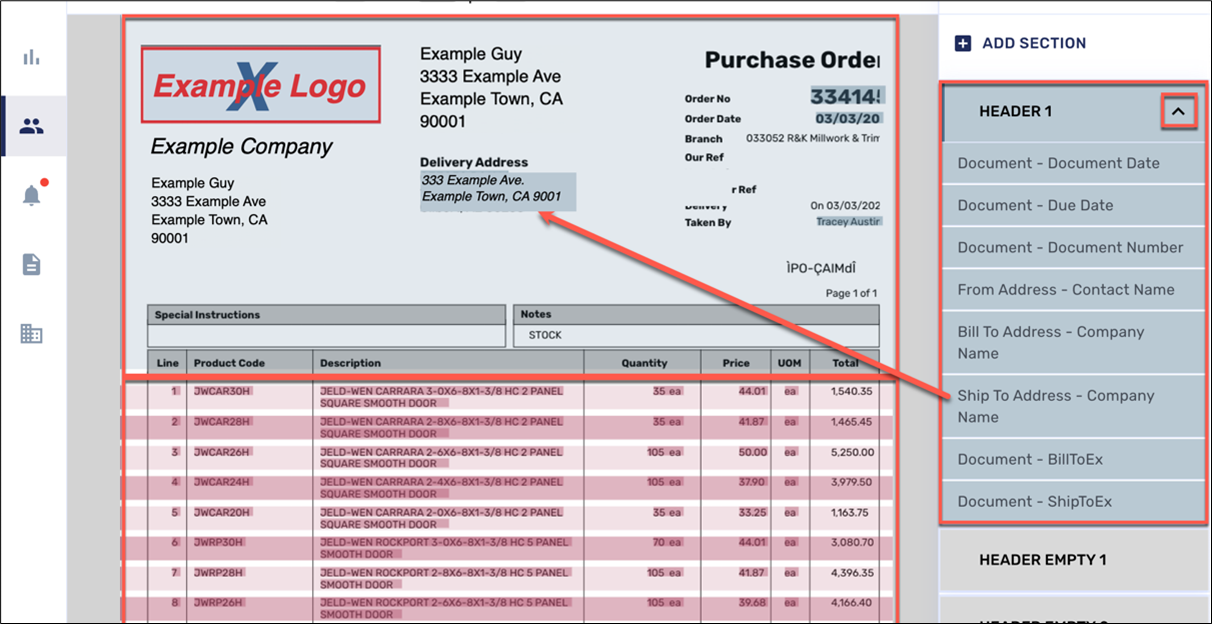
The panel sections that display in gray, titled “Empty,” are not defined. You do not need to delete or change them. If you prefer, you can hide them. (See “Selecting Basic Options,” above).
The sections and their fields on every page of a multiple-page document need to be reviewed for accuracy and completeness. You need to correct these sections and fields by either refining their definition, modifying them, or recreating them entirely.
Reopening the Configuration Screen
To reopen the Configure screen at any time, click Configuration in the Progress Bar. If you select new documents, as you move to the Configuration screen, the program automatically runs AI. Upon completion of the process, one document displays on your screen, as described above, showing the color coded sections of the configuration profile for that trading partner.
When you want to switch to one of the other documents that you selected, follow these steps:
-
Click the Documents icon in the Toolbar on the right side of your screen. The Selected Documents dialog box displays.
-
From the listings, click the document you want to display.
-
Click Switch Document. The document displays in the Configuration Screen. (See Switching Documents, above).