This application also enables you to systematically confirm what the OCR process produced.
In Conexiom’s overall process, a document that is not created in clear text can be interpreted through Optical Character Recognition, (OCR) in the Image Validator application.
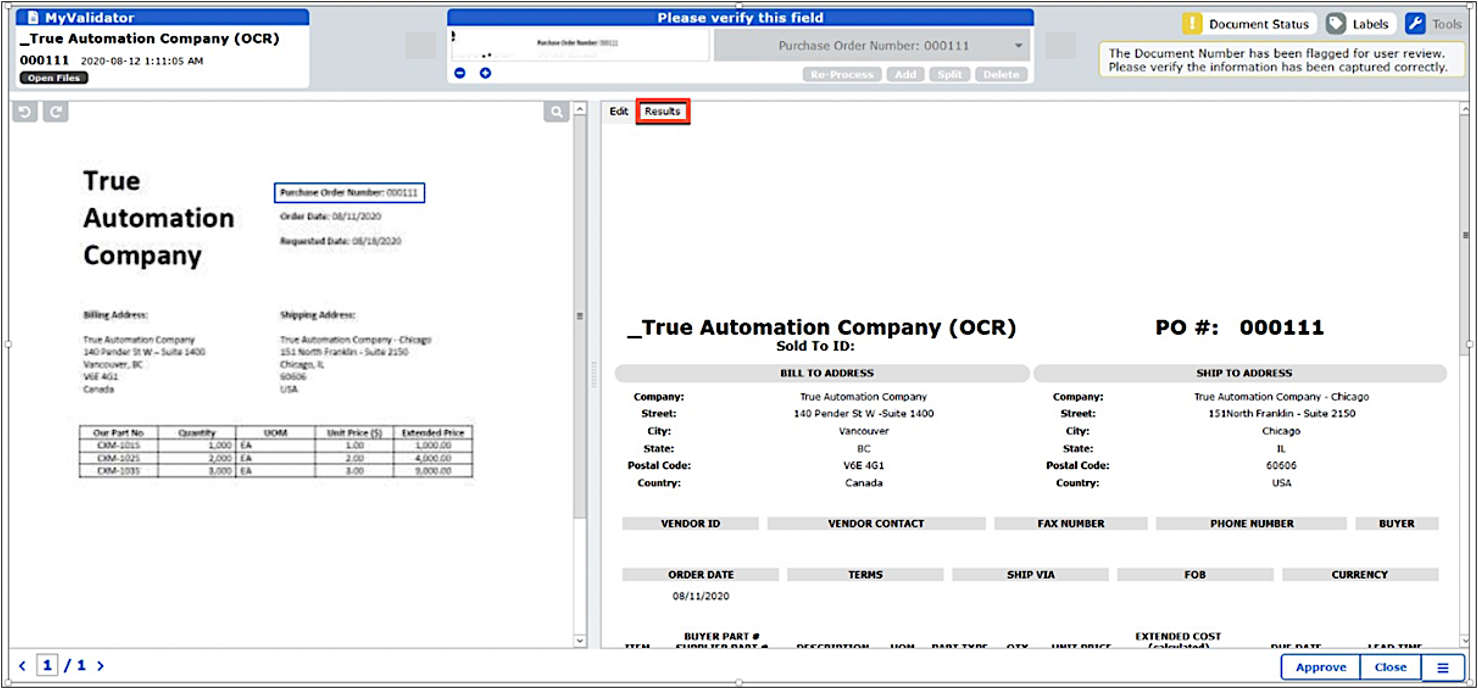
Image Validator comes into play to extract the raw data before the document can be processed through Conexiom. When users click on a Document Validation Required alert, Image Validator opens with the document in view.
When Image Validator opens, the original document displays in the left pane of the window and the data extracted by the application displays in the right pane of the window.
Completing a Document
To complete the document for processing, first find missing or incorrect fields on the right side of the screen and manually enter the correct information into those fields from the left side. To help with this task, Image Validator offers a number of tools.
The OCR Output Correction Workflow Process
To make changes in the document, these are the basic steps you follow with each variation:
-
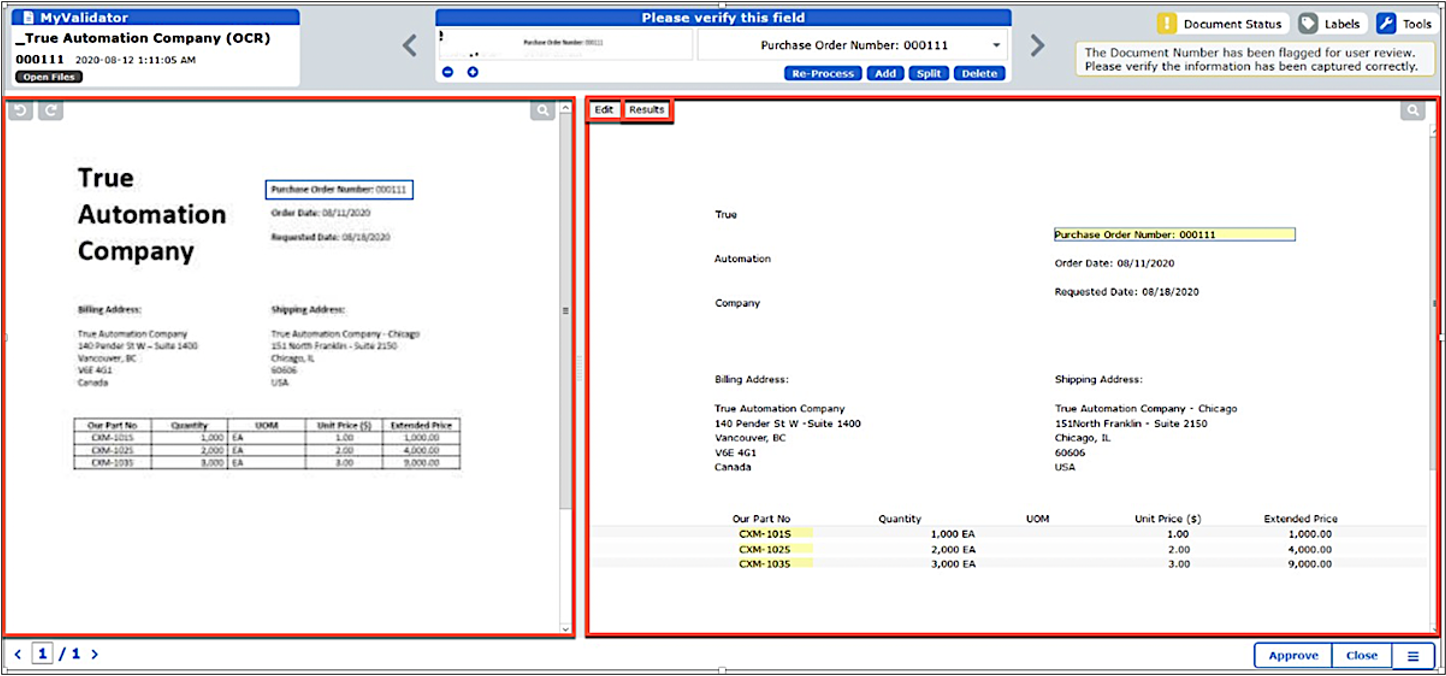
In the upper left corner of the right side of the Image Validator screen, there are two tabs: Edit and Results. Click the Edit Tab to use screen management tools and to identify changes that need to be made. This is the raw data view, as opposed to the view of the output that the Results Tab produces.
-
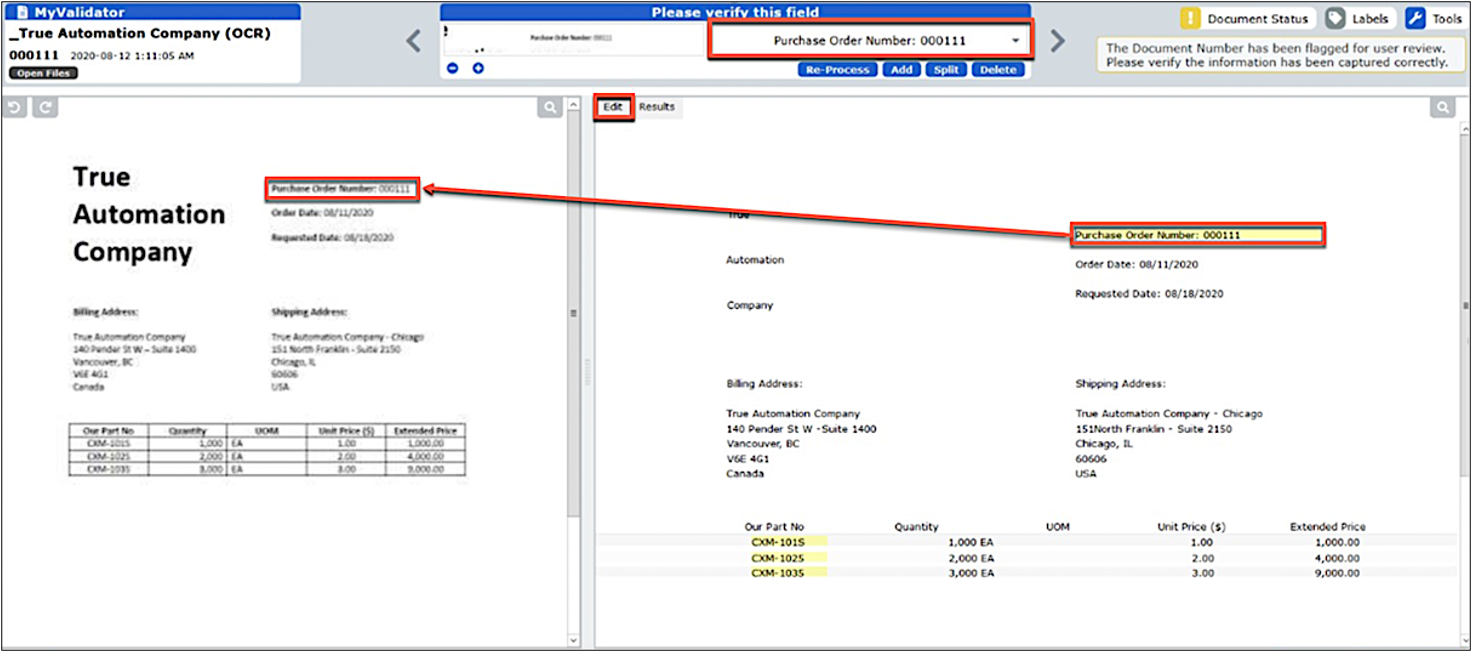
Select a field that is incorrect or whose information is missing. When you select a field, the associated area in the original image-based document on the left also highlights. Additionally, the data-entry field at the top of your screen, in the header, displays the field’s contents.
-
Change the data-entry field’s contents to make the change in the field you selected in the OCR output.
-
Click Reprocess to implement your changes.
-
Click the Results tab to see view of the output after your changes. This view is based on the company’s document template, as opposed to the raw data of the Edit Tab. This is where you do a final review before approving the document.
You cannot make corrections from the Results tab.
-
For further corrections, repeat steps 2-5.