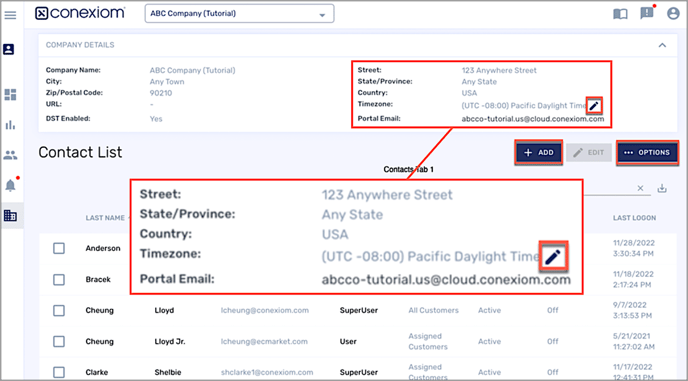
Company Details
Each company’s details are listed in the top segment of the screen. If you have appropriate permissions, the Modify Time Zone Edit icon displays. Click it and a dialog box allows you to configure of the Portal’s time zone. The dialog also allows the enablement of daylight savings time.

The Contact List
The lower segment of the screen displays the Contact List where each of the company’s contacts are listed. Contacts can be thought of as a list of Users for Conexiom.
Adding Contacts
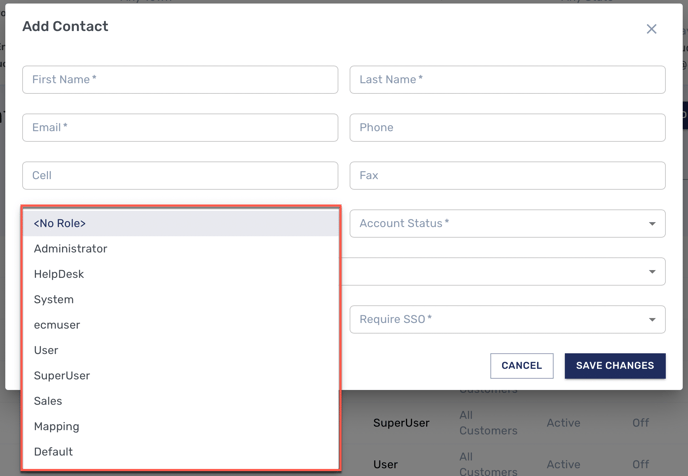
To add a user to the Contact List, follow these steps:
-
Click Add. The Add Contact dialog box displays.
-
Enter the appropriate information in each field:
First Name, Last Name, Email, Account Status, and Role Access are mandatory—as shown by the asterisk (*).
Note: Be sure the email is correct as it notifies the user that they have been set up. -
When selecting a role, designate it as Active or Inactive.
Note: Super Users can modify the default role’s permissions. (Under Settings and Permissions). -
Two-factor authentication refers to login security. From the drop-down menu, make a selection according to your company’s policies.
-
-
Click Save Changes.
Edit Contacts
To edit one or more user on the Contact List, follow these steps:
-
Click the checkboxes that correspond to the contacts you want to edit.
-
Click Edit. The Contact Dialog displays.
-
Enter the changes you want to make.
-
Click Save Changes. All of the listings you selected are changed.
Deleting Contacts
You can delete a user from the Contact List at any time.
-
Click the checkboxes that correspond to the contacts you want to delete.
-
To delete a user, click Options and from the menu that displays, click Delete.
-
Click Save Changes.