Using Rules Based Order and Document Processing (RBOP).
Setting up RBOP as an Email Forwarding Strategy
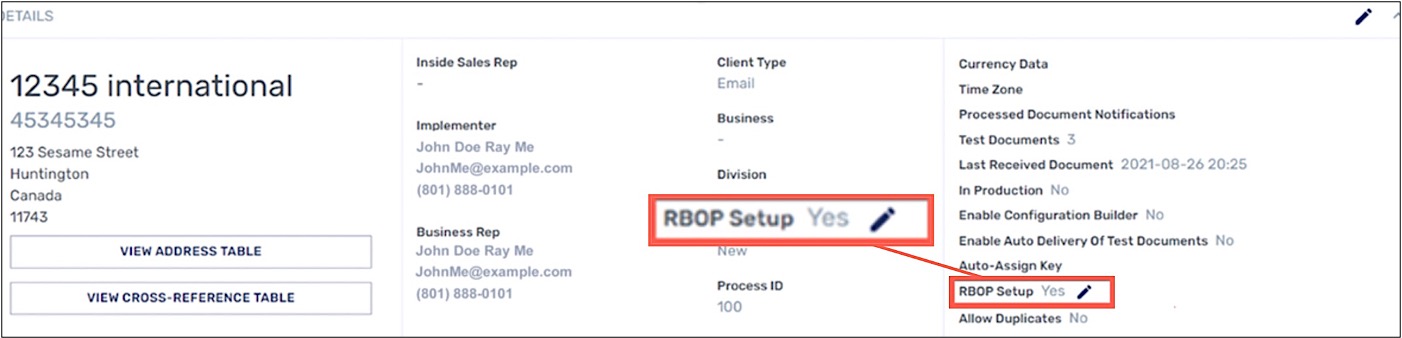
Ensure that your portal account has been enabled by Conexiom Support to be configured for RBOP. To do so, contact support. Once enabled, proceed with configuring each trading partner for RBOP. When your portal has been enabled, in the in the right-hand column of Details section, of the Customer Details page, next to the listing RBOP Setup, you will see “Yes.” Additionally, in the Company Details section, (top section), of the Company Tab, you will see the notation “Yes” next to the line RBOB Enabled.
Remember that not all trading partners may be good candidates for RBOP; some may be better suited for other options.
There are five basic tasks to setting up Rules Based Order/Document Processing. The first four tasks are accomplished within the portal. Completing these tasks will not “turn on” RBOP; their completion simply informs Conexiom of how to determine if a document should be processed or not. The tasks follow:
Email server rules must be configured before RBOP is functional and must be completed as the final step, after the Conexiom portal elements are configured. That is because the mail-server rules trigger the RBOP process for each trading partner.
Setting Up RBOP
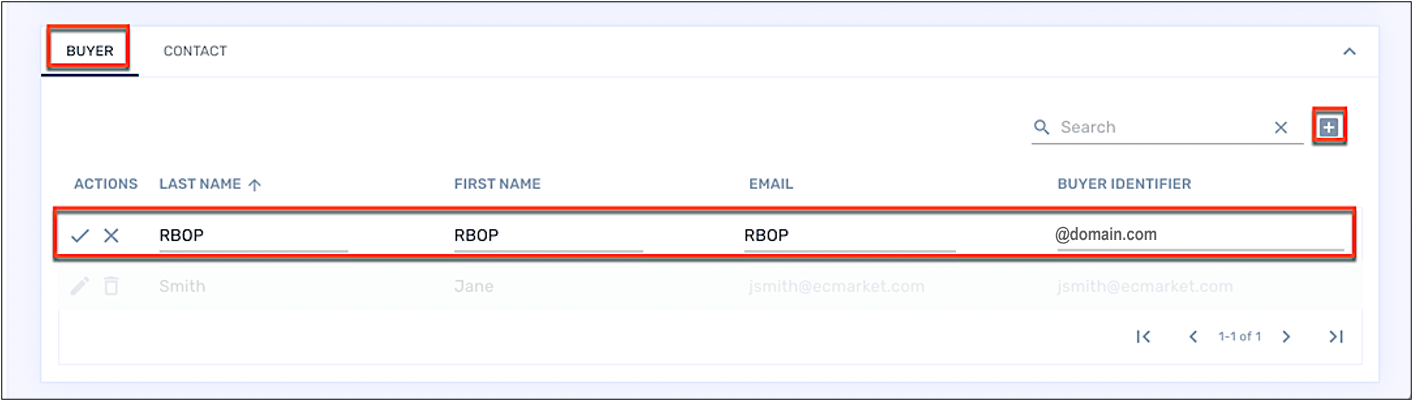
The Buyer Identifier is defined by a line entry in the Buyer Section of the Customer Details page for each trading partner in the Conexiom portal. It is listed by the domain address.
To create the Buyer Identifier listing, follow these steps:
-
From the Customers tab, choose the trading partner you want for whom you want to set up a Buyer Identifier.
-
From the Customer Details page of that trading partner, scroll down to the Buyer section.
-
Click the Plus icon (+) to add a new line in the Buyer table. A new line displays.
-
In the Last Name field, enter RBOP.
-
In the First Name field, again enter RBOP.
-
In the Email field, again enter RBOP.
Technically this field is not consulted by the application, so can be any entry. -
Enter one of the following:
-
The domain from which the email is coming to the client customer. For example, “@abccompany.com.”
-
A specific email address for an employee (not recommended).
-
When all of the steps are complete, in the in the right-hand column of Details section, (second section), of the Customer Details page, next to the listing RBOP Setup, you will see “Yes.” This indicates that the trading partner’s portal has been enabled to use RBOP.
Adding a File Type
When your Conexiom portal has been enabled to use RBOP (see above), you can set up File Type. To do this, follow these steps:
-
In the Details Section of the Customer Details Page, next to the RBOP Setup designation, click the Pencil icon.
-
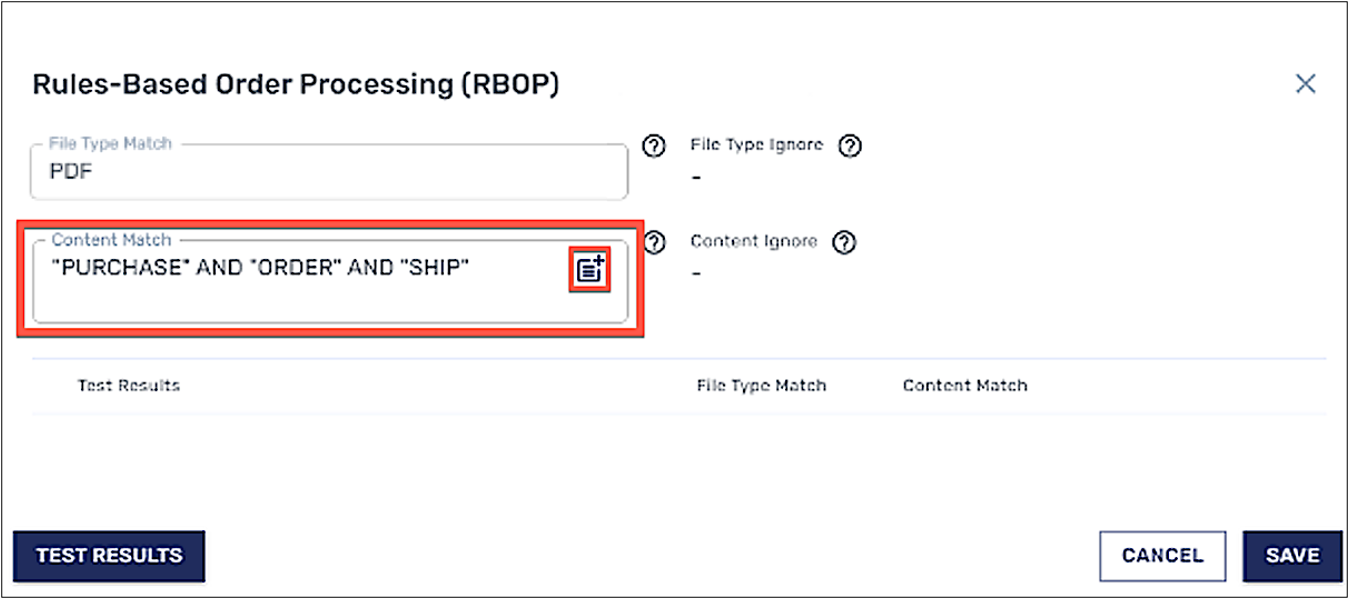
In the File-Type Match field, enter the document type that this customer’s map is set up to process. For example, enter PDF, XLS, DOC, or something similar.
This field is not case sensitive. However, we recommend if the file extension for the trading partner is XLSX or DOCX, do not include the final “X” in your entry because the system does a partial match.
Adding a Content Match
The Content Match field lies directly below the File Type Match field. It uses key terms to help identify documents. For example, a purchase order might include “Purchase,” “Order,” and “Ship.” To add Content Match terms, follow these steps:
-
Click the Document icon within the Content Match field. A list of terms displays in the Content Match field.
-
In the Content Match field, delete all except the first three choices. (Using more than three terms can make your filter too specific.)
Terms must adhere to the following rules.
-
Fields are not case-sensitive. (In the example above, upper-case letters are used for emphasis only).
-
Quotation marks must surround each term.
-
The conjunction “and” must be between each term in the list.
-
There must be one single space between each word in the list.
-
Other than quotation marks, do not enter any type of punctuation, including commas.
Testing
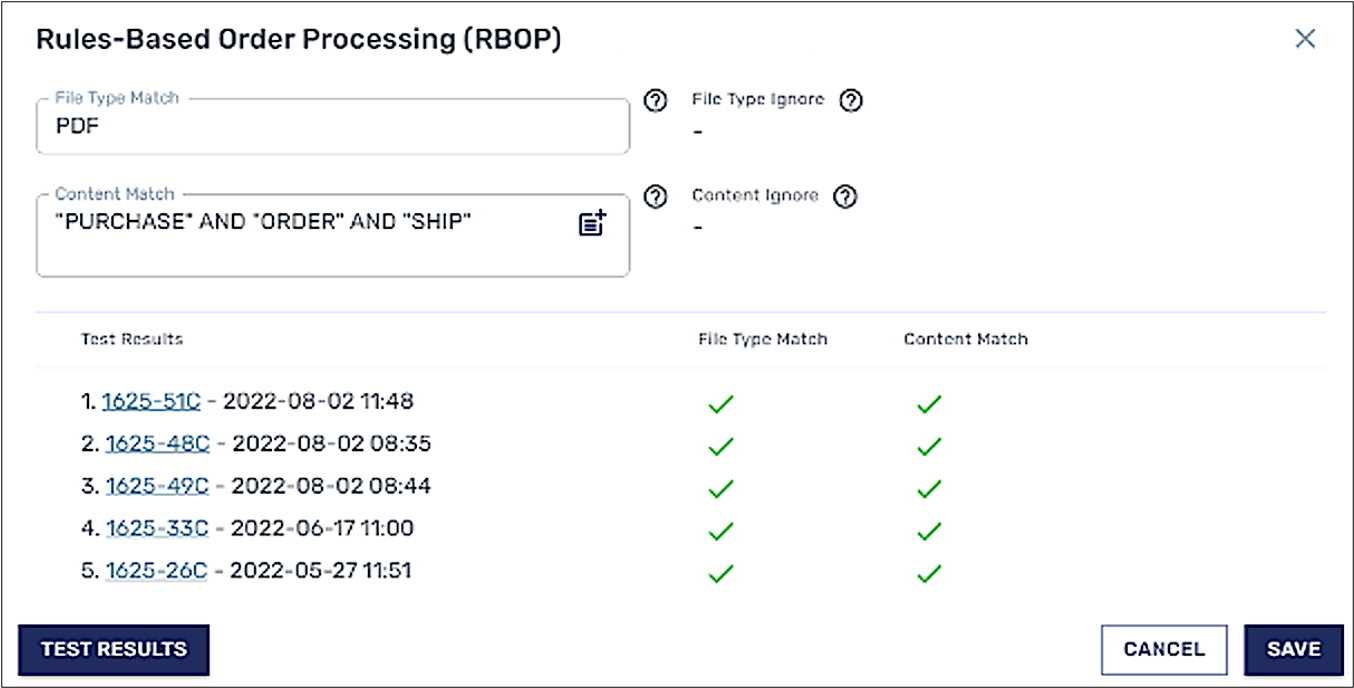
To run a regression test against the documents for that trading partner to confirm the file type, match terms, and match documents previously processed within that trading partner, do the following:
-
Click Test Results. If you have configured the RBOP correctly, for all of the documents that are listed, green check marks display under both File Type Match and Content Match. When conditions are not satisfied in the regression test, a red X displays.
-
If a red X displays, click the hyperlinked document to troubleshoot the problem. To do so, first confirm the following:
-
Your document is supposed to be a match for the file type, such as PDF.
-
The content terms you selected are all present in the failed document.
-
-
When all documents display a green checkmark, click Save. The dialog box closes.
Email Server Rule Setup
When the first four tasks are completed in the Conexiom portal, the final, step to turn on RBOP is to set up a mail server rule within your organization's mail server. (If a rule has already been set up for RBOP, you can add the trading partner’s domain to that rule). This task requires a member from your IT team with email-server access and an administrator account; it cannot be accomplished from a user-level account.
All Conexiom portal setup items must be completed before setting up this rule on your email server.
When these rules are satisfied, email will be blind-copied (“bcc:”) to your Conexiom RBOP email address. (This address is different from your regular Conexiom email address). To find this email address, in the Conexiom portal, click the Company tab. Your RBOP email address is listed in the Portal Email section. It will include the characters “.cc” within it.

Your mail server rules can be set up to have multiple domains for each rule. For example, if you want to put 100 trading partners on RBOP, you don’t need to set up 100 rules in your mail server. Instead, set up one rule for each file type: one rule for all of your PDF trading partners; one rule for all your XLS trading partners, etc.
The rules and actions to be configured on the email server include the following:
-
The domain from which the email is coming
-
The requirement of an attachment in the email
-
The requirement of a specific file type, (i.e. PDF, XLS, etc.)
-
The action to prepend the subject line of emails that are copied (bcc’d) to Conexiom with an indicator of your choice. For this, we recommend something both subtle and short. For example, “CXM” designates Conexiom, but is not easily interpreted out of context.
Note: Prepending an RBOP email’s subject line is important because it will indicate to the original recipient that an email they have received has already been blind-copied (bcc’d) to Conexiom. Be sure to communicate this to your team before activating RBOP for a trading partner to prevent additional submissions to Conexiom. -
The action to blind-copy (“bcc:”) the email to your Conexiom RBOP email address.
Below is an example of how rules may be set up on an email server. The configuration of your email server will differ depending on its brand, your email client, and your license version.
For questions, see documentation for that server.
|
Field |
Description |
Example |
|
Name |
Name of rule |
“Conexiom PDF” |
|
Apply this rule if this condition is present … |
Condition for rule to apply: List domains to which the rule applies |
“Trading partner1.com; Trading partner2.com” |
|
And if this condition is present |
Other conditions for rule to apply: List file extensions to include the file types of the inbound documents such as .pdf, .xls, etc. |
Select from dropdown menu: “Any file extension matches... .pdf |
|
Do the following |
Send the message to the address in BCC field |
Select from dropdown menu: “BCC the message to… RBOP email address” |
|
And do this |
Short encoded word or phrase to show user message has been sent to Conexiom |
Select from dropdown menu: “Prepend the subject with… CXM” |
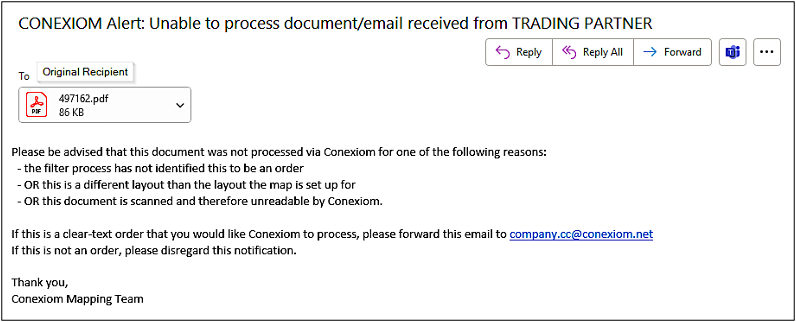
Example Email Notification
Below is an example of the email notification that goes to the original recipient of the original email if Conexiom does not determine it to be a valid document for processing.
This will happen when not all of the filter requirements are satisfied that are set up in the Conexiom portal (file type and match terms) or if the document is not in clear text (i.e. scanned) and therefore not readable by the Conexiom engine without the use of OCR technology.