.png)
Testing and Deploying Changes on Document Templates from The Validation Screen
Check the accuracy and completeness of your document template on the Validation screen, including running a regression tests on either test or production document-templates.
Overview
The overall process that Configuration Studio goes through four steps, as outlined by the Progress Bar across the top of the screen. Validation is the last those steps. Here that you can check the work you did on the previous screens, validating the configuration-profile document template (or “map”) in terms of both accuracy and completeness. You can also click Submit to deploy the document template in order to put the changes you made into effect immediately, without testing it first.
Modifying a document template that's for a trading partner which is already live, in production, enables you make changes instantly, without submitting a change request, giving you full control through a self-serve workflow.
Note: To access Configuration Studio on a trading partner already in Production, you first need to enable this application in the Permissions page. See more information in this article.
Regression Testing
Before submitting updates to any template, we strongly recommend running a regression test. Regression testing helps confirm that your recent changes have not unintentionally affected how the rest of the document‑capture process works. Even small adjustments can create unexpected ripple effects in a live production environment.
To safeguard against these unintended effects, regression testing rechecks the entire configuration of the template instead of only the areas that were edited. This full review helps you verify that:
Any differences in the results are intentional
No new issues were introduced
The template performs as expected after your changes
It is important to note when reading results, an item highlighted in red in the results of a regression test does not automatically indicate a problem. Instead, it indicates that results differ from the previous version of the template, allowing you to evaluate whether those differences are expected or require additional adjustments. This evaluation ensures you can make an informed decision before submitting your changes.
Changing, Testing, and Submitting a Document Template (or “Map”)
In the Progress Bar, click Validation. Once there, click the Result tab.
Important: When performing a regression test on a Production trading partner, in order to facilitate an effective comparison, you must run the test against a document from that trading partner which has been tested and delivered previously.Before proceeding with any of the options below, rigorously evaluate each field and return to the Configuration or the Business Logic steps for further work, if needed. Alternately, you can also request changes from Conexiom by referring to the instructions directly below in “Requesting a Change from Conexiom.“
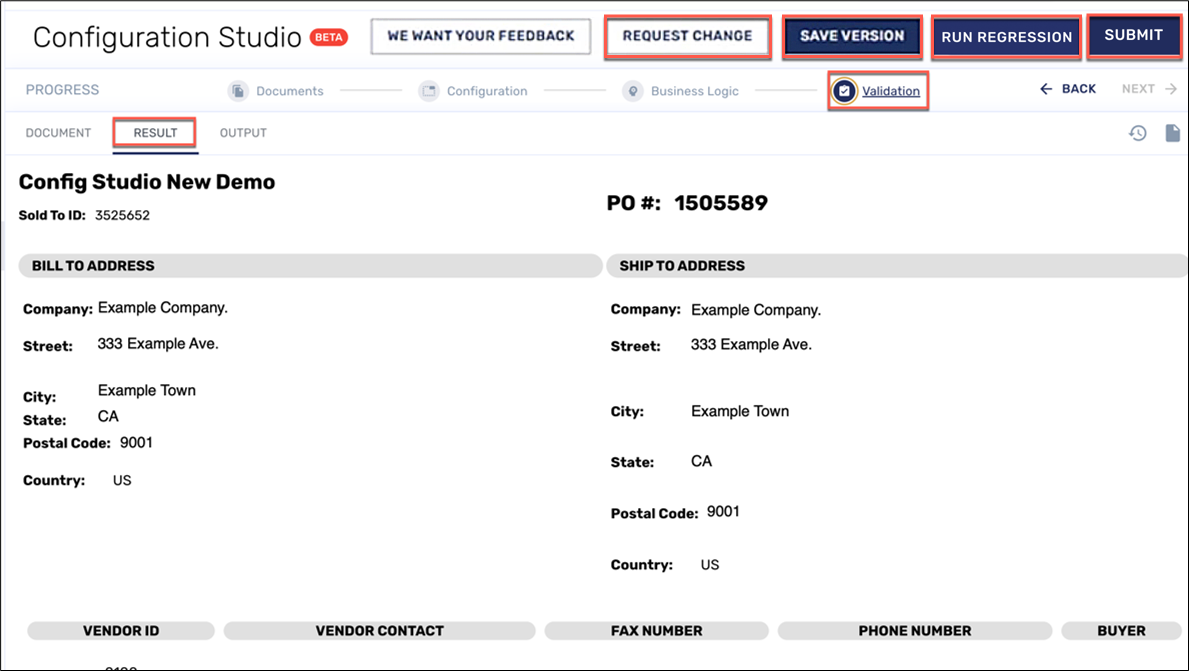
Validation Screen, Results Tab
Preliminary Steps
Whether a test or a production-document template, any time you make a change, use this standard procedure for validating your changes:
Finish making the changes you want in the document template on the Configuration screen and the Business Logic screen.
In the Progress Bar, click Validation. Once there, click the Result tab.
Before proceeding with any of the options below, rigorously evaluate each field for needed changes. If necessary, return to the Configuration or the Business Logic steps for further work. Alternately, you can also request changes from Conexiom by referring to the instructions directly below in “Requesting a Change from Conexiom.“
Requesting a Change from Conexiom
To request a change to your configuration-profile, follow these steps:
Click Request Change. The Request Change dialog displays.
Click the field to display the drop-down menu and from it, select the general type of change.
Click Launch under Text Request Change or Request by Email.
If you click Launch under Text Request Change, a questionnaire dialog displays, asking you to describe in detail the changes you want to make.
If you click Launch under Request by Email, your email application will display with a new, blank message. Fill in the request.
For more information on change requests and their best practices, see Submitting Change Requests.
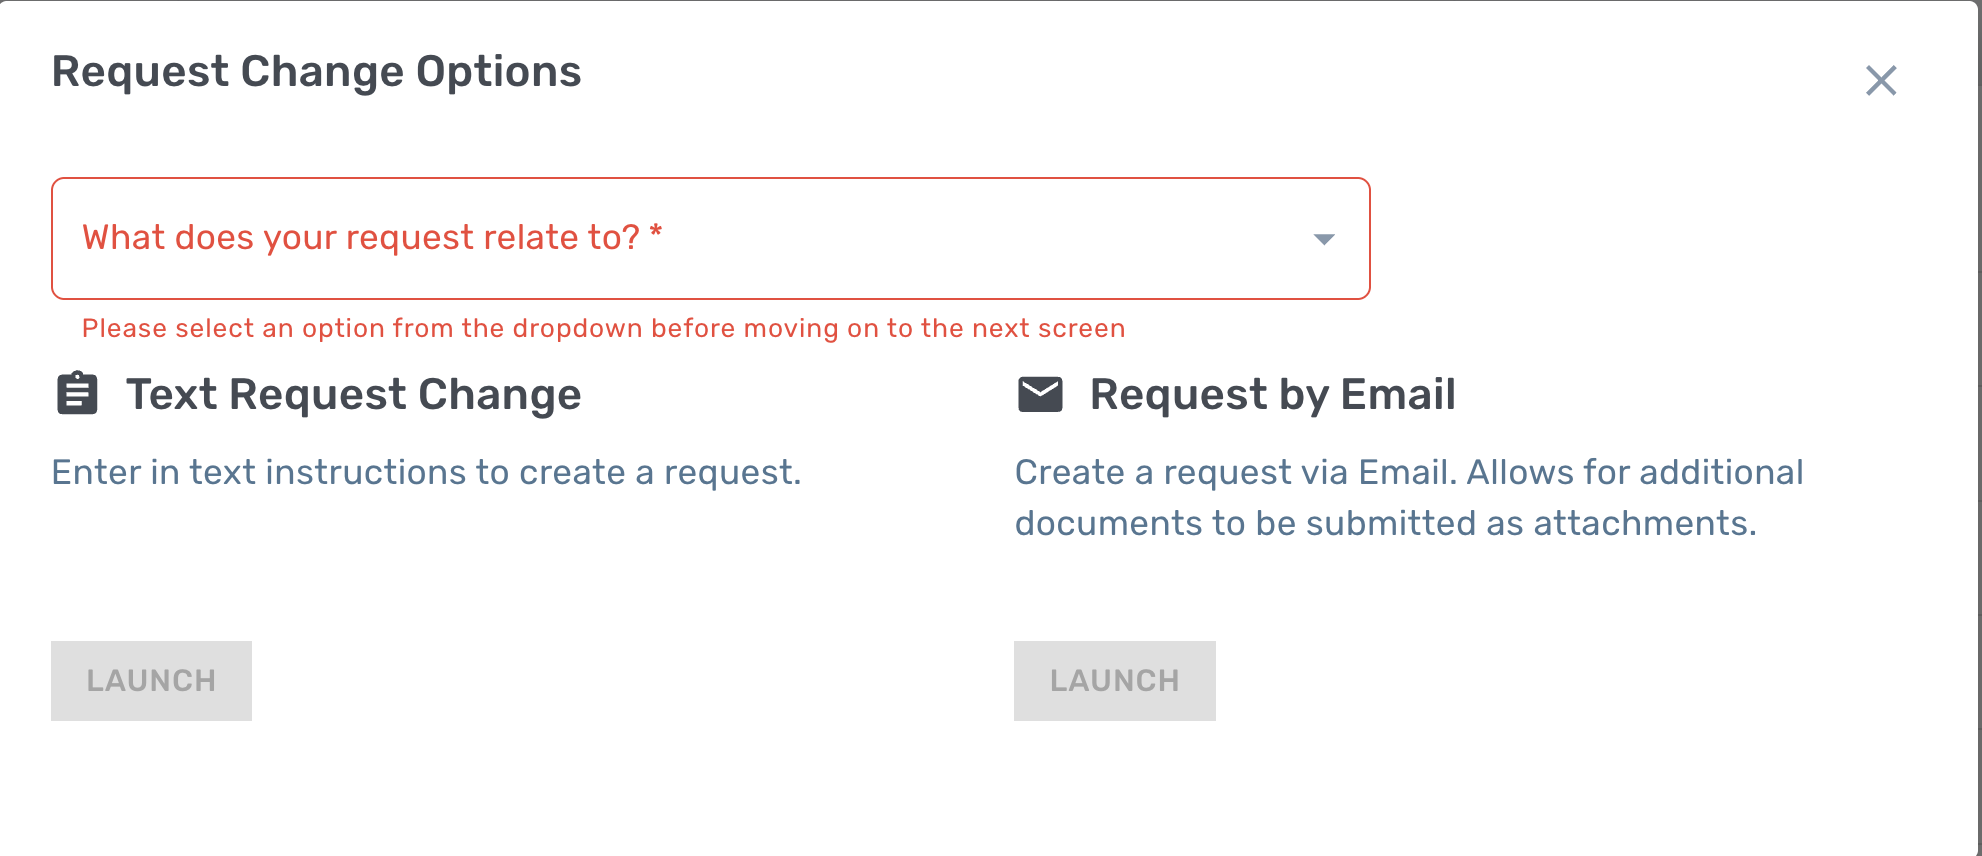
Change-Request Dialog
Saving Changes
Whenever you make changes to a document template, click Save Version. This feature provides added advantage in case you want to return to the template later. For example, you might make changes to a document template and then deploy it, only to discover that there are problems with it. In that case, you can restore the previous version and start the change process over. For more information, see Restoring Previous Versions.
Validating Changes through Regression Testing
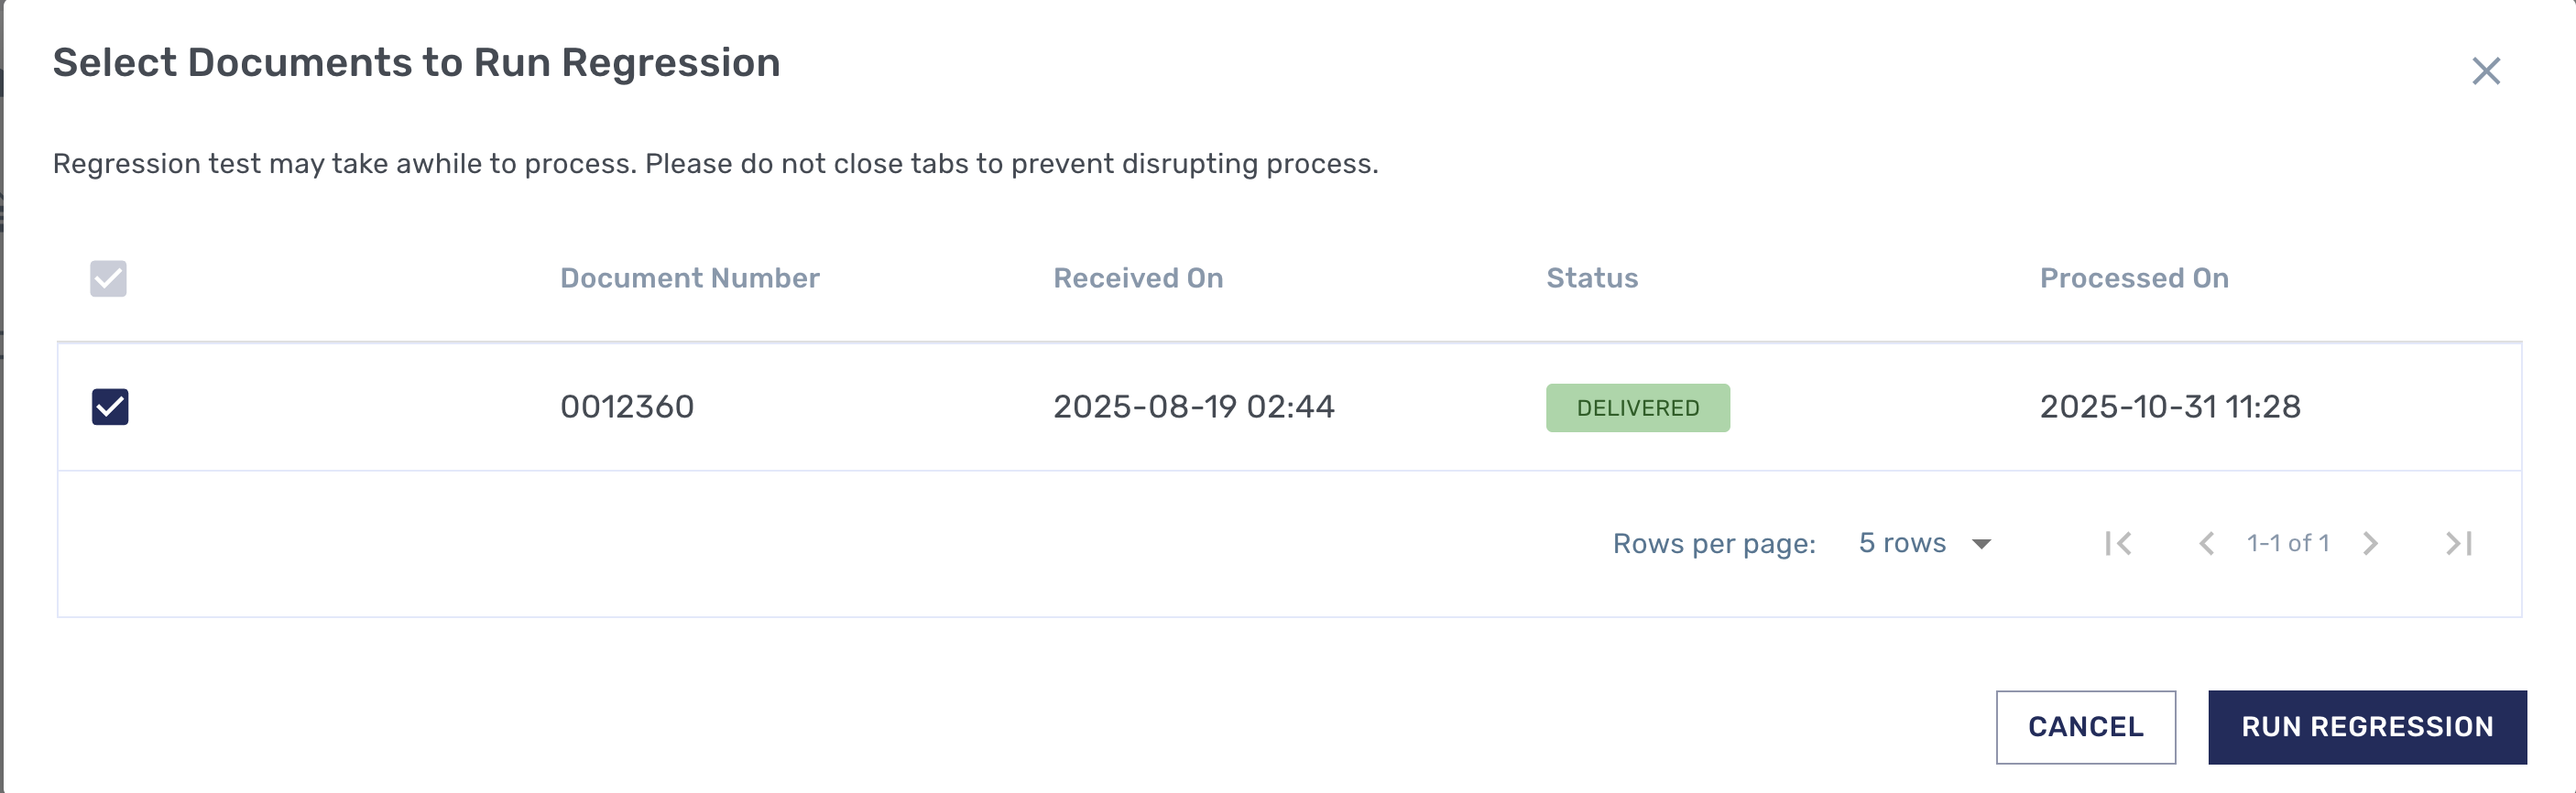
First Regression-Test Dialog
To run a regression test on your changes, follow these steps:
Click Run Regression. The Run-Regression Test dialog displays.
Check the box that corresponds to the documents you want to test.
Important: When performing a regression test on a Production trading partner, in order to facilitate an effective comparison, you must run the test against a document from that trading partner which has already been tested and delivered previously.Click Run Regression. The testing begins with the display of a warning that the process may take some time. When a document template has been tested previously, the new version is compared with the previous one and differences are noted. When testing is complete, the Regression-Test Results dialog box displays, (see image below).
This final dialog box lists which factors within a tested template were processed successfully by the system. For example, if a Line Item definition has been tested, the success or failure is reported with color codes.
If an item that has been changed from the previous version is successful in processing but is different, that difference is reported as either Updated, Added, or Removed.
For example, if a Line Item has been mapped since the previous version was tested, then the Results dialog box will list that as “+Added Line Item…” and then specify which line item it is referring to.
In the following table, find the definitions for each of the possible results. When you are satisfied with the information in the Regression-Test Results dialog box, click Close.
Result | Meaning |
|---|---|
Identical (Green) | Everything still works as expected for this document. Proceed with submission. |
Different (Red) (See image, “Final Regression-Test Dialog: Results,” below) | Evaluate the differences carefully.
|
New Failed-Old Passed (Red) | The change caused the template to stop working. Adjust your previous changes and test again. |
Old Failed-New Passed (Green) | Your update improved the template and it is processing successfully. Proceed with submission. |
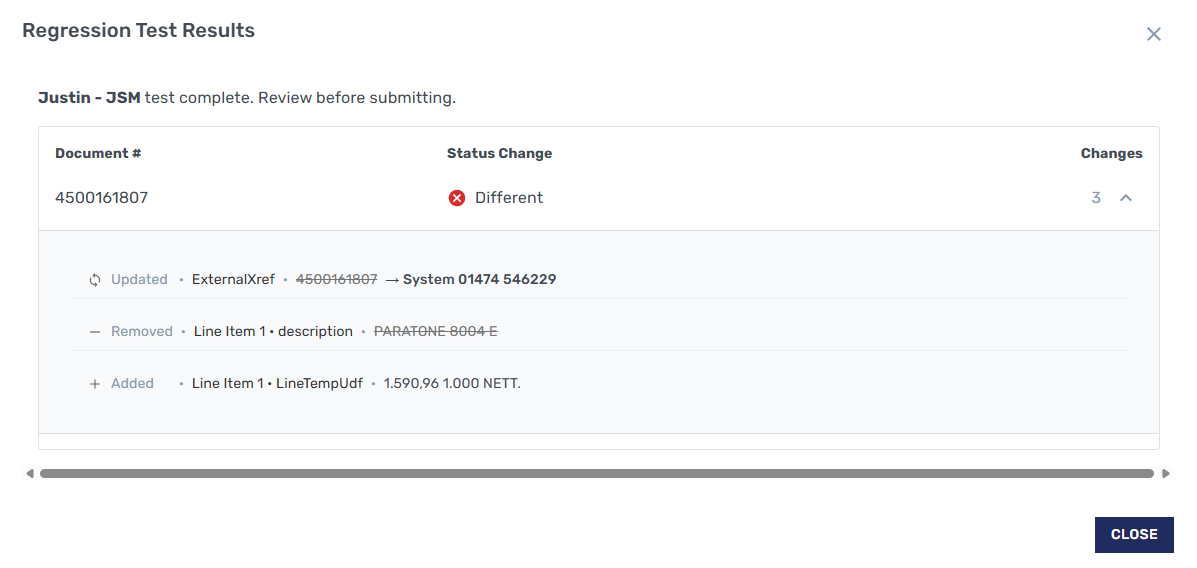
Regression-Test Dialog: Example Results
Submitting Changes
Whether you have run regression testing or not, click Submit to deploy the changes you made. The changes go into effect immediately.
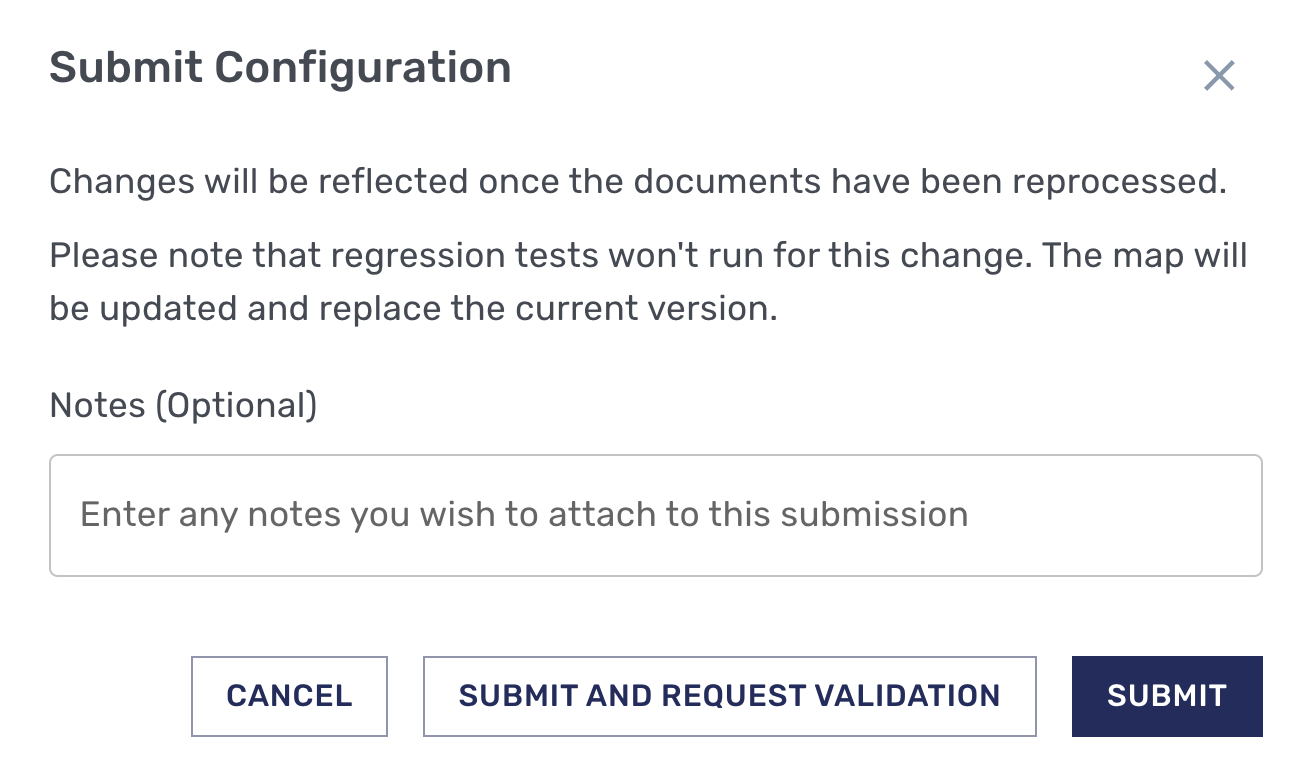
Submit Configuration Dialog
To Submit changes, follow these steps:
Click Submit. The Submit Configuration dialog displays.
In the Notes field, enter any notes that you think will be valuable for describing this version of your template.
If your trading partner is in the testing phase, (as opposed to being in production), you will see one button that reads “Submit and Request Validation” and one that reads “Submit.” If your trading partner is in production, only the “Submit” button displays.
To submit the template and change the status of the trading partner to “Validation Required,” click Submit and Request Validation. The status change shows team members the trading partner’s need for testing. This is valuable for the first time a template is submitted for a trading partner.
To simply submit the template, click Submit. This is useful in the testing process after the trading partner’s status has already changed to Validation and you are deploying changes subsequent to the initial map. The changes go into effect immediately.
Reverting to Previous Versions
If you need to revert to a previous version of the configuration template, you can do so from the Configuration screen by selecting the version you want to restore. For more details, see this article.