
Create and optimize fields. They contain the important information Configuration Studio sends to your ERP or uses in the document’s business Logic.
Note: This article works with general information on fields as opposed to specific information of field definitions as the article Using and Modifying Field Definitions in Configuration Studio does.
Overview
The fields in each section contain the information that Conexiom sends to your ERP or uses in the document’s business Logic. Other information on the document can be left undefined.
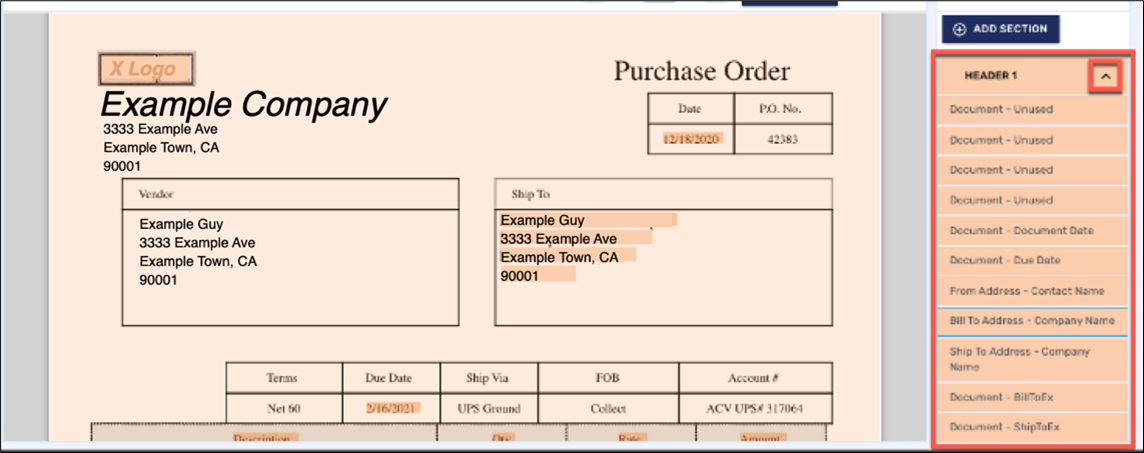
In the example above, along with unused fields, you can see the following fields were defined:
|
|
Viewing Field’s Physical and Information-Related Definitions
You can view a field’s definition in one of two ways:
-
By selecting the field in a listing
-
By the selecting the field in the document
By Listing
From the Document Sections dialog in the panel on the right of your screen, click the arrow in the upper right corner of one of the field’s listings. Field listings display.
-
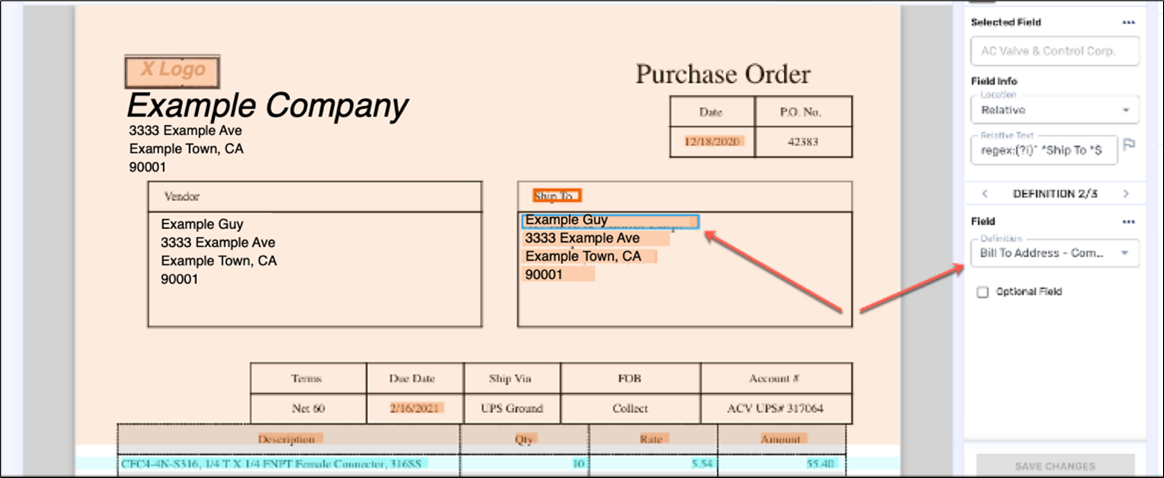
From the field listings, click the field you want. The Field Configuration dialog opens in the panel in place of the Document Sections dialog displaying the current field definitions.
By Document
-
Identify the field on the document on the left.
-
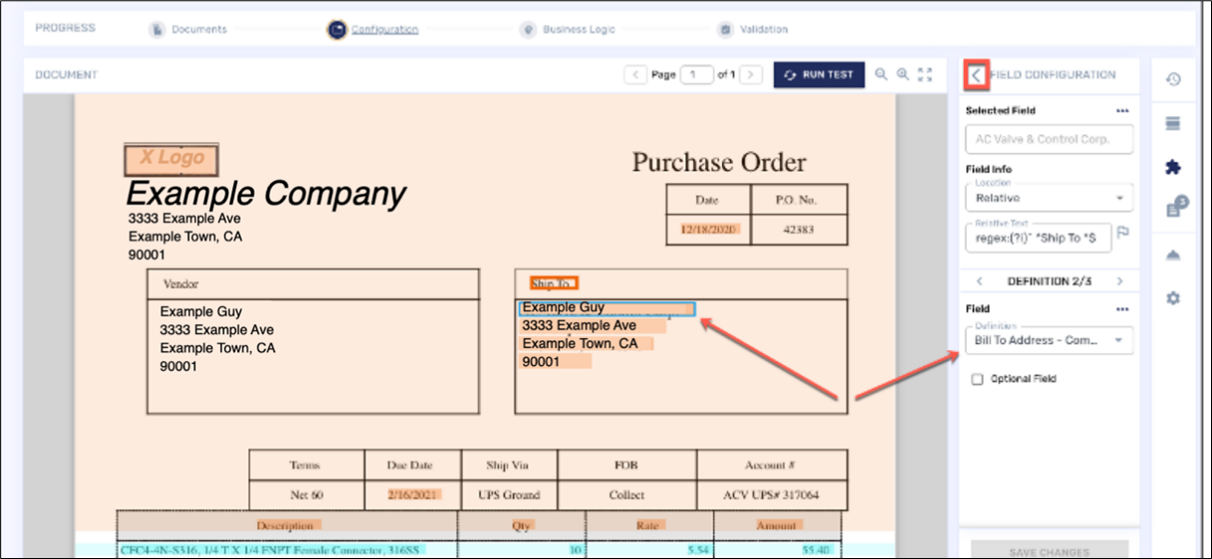
Click the field. The Field Configuration dialog opens in the panel in place of the Document Sections dialog.
When the Field Configuration dialog is open in the right panel, check all of the information for that field. You can click Validation at the top of the screen to help you verify completeness of capturing all the required fields. (See Saving and Validating Changes).
When all of the information is correct for the fields in all of the documents you have selected, you can move forward with the overall process by selecting the Business Logic tab.
Creating and Modifying Field Definitions
Every page of a multiple-page document needs to be reviewed for accuracy in the definition of fields they display. As with sections, fields that are not accurate need to be refined, recreated, or removed entirely. For example, if you notice that the wrong information was placed in the Bill To Address field, you need to correct that information.
You can modify the physical area of a field, such as where it is located or what it contains. For example, if the Bill To Address is not complete, you may need to expand the physical field to include all of the information.
You can change the block of text that goes with a definition entirely. For example, if text is designated as the Bill To address but is actually the Ship To address, you can change the designation.
You can also change how the field’s information is expressed, such as when adding or subtracting special characters in order to follow the requirements or your ERP. For example, you may need to remove all of the hyphens in a phone number.
Changing Fields, General Instructions
To change a field or its definition, follow these steps:
-
Locate the field definition by doing one of the following:
-
Click the arrow in the upper right corner of the correct tab in the right panel and from the menu, select the correct field. The field definition opens.
-
Click the field on the document preview. The field definition opens.
(Also see Viewing Field Configuration Definitions).
-
-
Consider if the field is defining the right information, such as the text it captures. You can change what it captures or whether that text is right for the designation it’s given and then make changes. (See Editing Physical Fields).
-
Consider whether the text in the field is being expressed in the right way. For example, should there be a comma after the state in an address? (See Changing How Field Information is Expressed. Splitting the field definition to define more narrowly how the information is expressed is often helpful. For example, if the Ship To address is in a single block, do you need to modify one of its components like the phone number? If you needed to eliminate the hyphen from phone numbers because that was needed for your ERP, you would first split the field, isolating the phone number, and then you would delete the hyphen. (See Splitting Field Definitions).
-
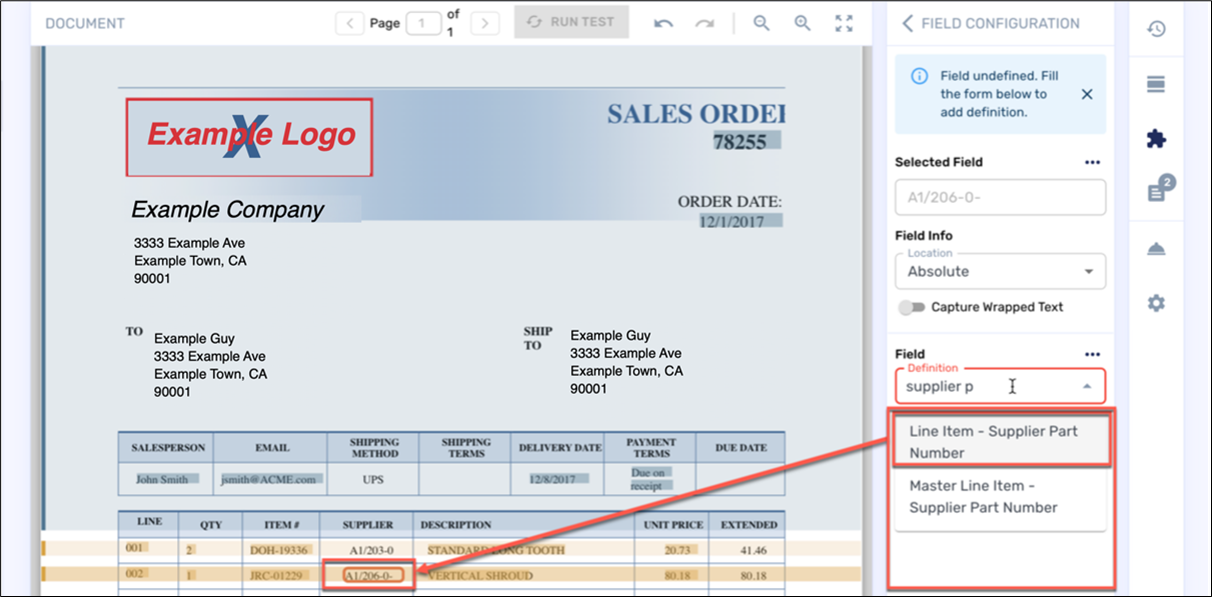
To modify a field definition or change the field definition entirely, you can manually enter information or select information from a drop-down menu, depending on the choices offered when you click on the field.
-
Click Commit Change.
-
If all your changes are complete, follow the standard procedure for saving changes. (See Saving and Validating Changes).
Making the Field Location Relative or Absolute
In the Field Info field, you can choose to make a field Absolute or Relative.
Absolute
Absolute gives the location a strict definition for its address on the page that will not shift. It is mapped by its physical location (x/y coordinate) on the page. For example, an item in the item listings should be defined as absolute because it needs to display appropriately in relation to the page.
Relative
Relative designations are usually for the Header section. Relative means that a field is set in relation to another field. For example, the field for the number of a purchase order should be associated with the with the “Purchase Order #” label.
To set the location as relative or absolute, follow these steps:
-
Make a selection. For example, on a purchase order, select UPS.
-
From the Field Info drop-down menu in the panel, select
-
To make the relative association, click the Ship Via On the document, a red dotted line shows the two terms have been mapped.
-
Click Commit Change.
-
If all your changes are complete, follow the standard procedure for saving changes. (See Saving and Validating Changes).
Capturing Wrapped Text in a Field
Especially in line items, information such as descriptions can be lengthy enough as to require more space than is allotted by a single line in the table. For that reason, you can click the Capture Wrapped Text toggle switch to solve the problem.
-
Click one of the fields that requires text to be wrapped. For example, click a Description field with text.
-
Click the Capture Wrapped Text toggle switch in the right panel.
-
Click Commit Change.
-
If all your changes are complete, follow the standard procedure for saving changes. (See Saving and Validating Changes).
Making the Field Optional
To make the field optional, follow these steps:
-
Check the Optional Field
-
Click Commit Change.
-
If all your changes are complete, follow the standard procedure for saving changes. (See Saving and Validating Changes).
Saving and Validating Changes
Any time you make a change, use this standard procedure for saving, testing, and validating your changes.
-
Finish the changes you want to make.
-
Click Commit Change.
-
In the Progress Bar, in the application header section above the document, click Validation. There evaluate your changes on the Result tab of the Validation Screen.
-
When you can see that the test has gone well, click Save Version. In the Version Notes field of the dialog box that displays, make appropriate notes. For example, write a description to help you and other teammates understand the changes made to that version.
-
When you have made all the changes for all of the fields you need to, move forward with the overall process by clicking Business Logic in the Progress Bar. The Business Logic Screen displays.