Click the Documents Tab on the left side of your screen to access this page. To manage these documents, you can designate each with a tag to track whether further action is required. Among other things, the Documents Tab enables you to do the following:
-
See all Not-Processed document notifications from the last 45 days, together, in one space, without toggling between separate applications or windows, enabling you to organize them more efficiently.
-
Avoid missing notification emails without your needing to create inbox folders or inbox rules.
-
Easily identify processing issues, their trends, and the patterns in which they occur.
From the Documents Page, you can also open the document in the Document Details Page. From there, you can view the document’s complete history and open the PDF version that was submitted.
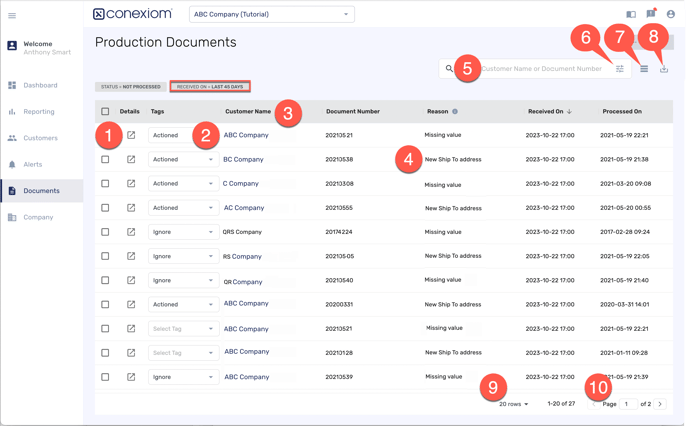
Descriptions of the Document Tab’s features follow. Numbers on the image correspond to descriptions below.
|
To view a document and its history in the Document Details Page, click the Open Page icon for that listing. The Document Details Page opens alongside a view of the PDF version of the document. (See The Document Details Page). |
|
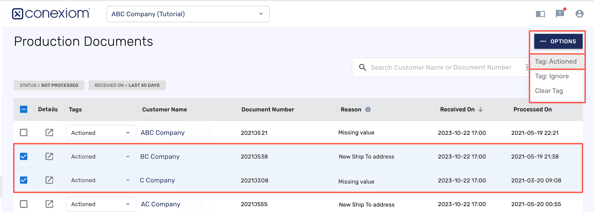
Individual Tagging To tag individual listings, follow these steps:
Tagging To tag more than one listing at a time, follow these steps:
 |
|
Click the Column Name in the header to sort columns and tags. Click the Arrow next to the column name to change the order of listings from descending to ascending and back. |
|
|
The Reason column lists the cause of the issue. The Reason column is not available for the Sort feature. To sort for Reason, click the Filter icon. (See Number 6). |
|
|
In the Search Field, enter a customer or vendor name or a customer or vendor number. The search-results list identifies possible choices that correspond to your entry. |
|
|
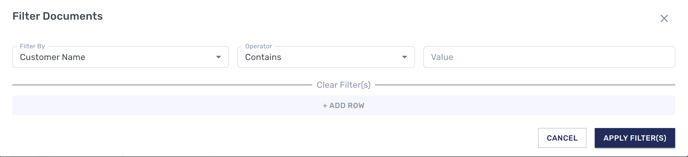
Click the Filter icon to define your search criteria as a custom filter, allowing you to move between screens without needing to reapply criteria. To define a filter, follow these steps:
 |
|
Click the Hamburger icon to display the Density menu. You can then set how compact the rows are listed in the data table. Select one of the following:
|
|
|
Click the Download icon to download the Document List without needing to run a report. |
|
|
Click Rows to display the drop-down menu and then select the number of rows to be shown on your screen. |
|
|
Go forward or backward through pages by clicking the Left Arrow or Right Arrow. Or, by entering a page number, go to that specific page. |
|
Not in image |
Using your mouse, scroll vertically or horizontally through all the listings on a page. To help you navigate, the header and footer remain static while you scroll, giving you the ability to continue to read column and row headings. (The horizontal and vertical scroll bars, not shown in Figure 1, will display on your screen’s right or bottom when you begin scrolling). |