
Set validation choices for your ERP Integrations, including the selecting the trading partners to which you want to apply the validations and editing rules.
Setting Validation Choices
You can set validation choices for your ERP Integrations, including the selection the trading partners to which you want to apply the validations and to editing rules for each of the validations, when choices are available.
Note: When you select the Validations sub-tab, an integration is already set. To change it, see directions below, under “Changing the Integration.”
Enabling or Disabling Validations
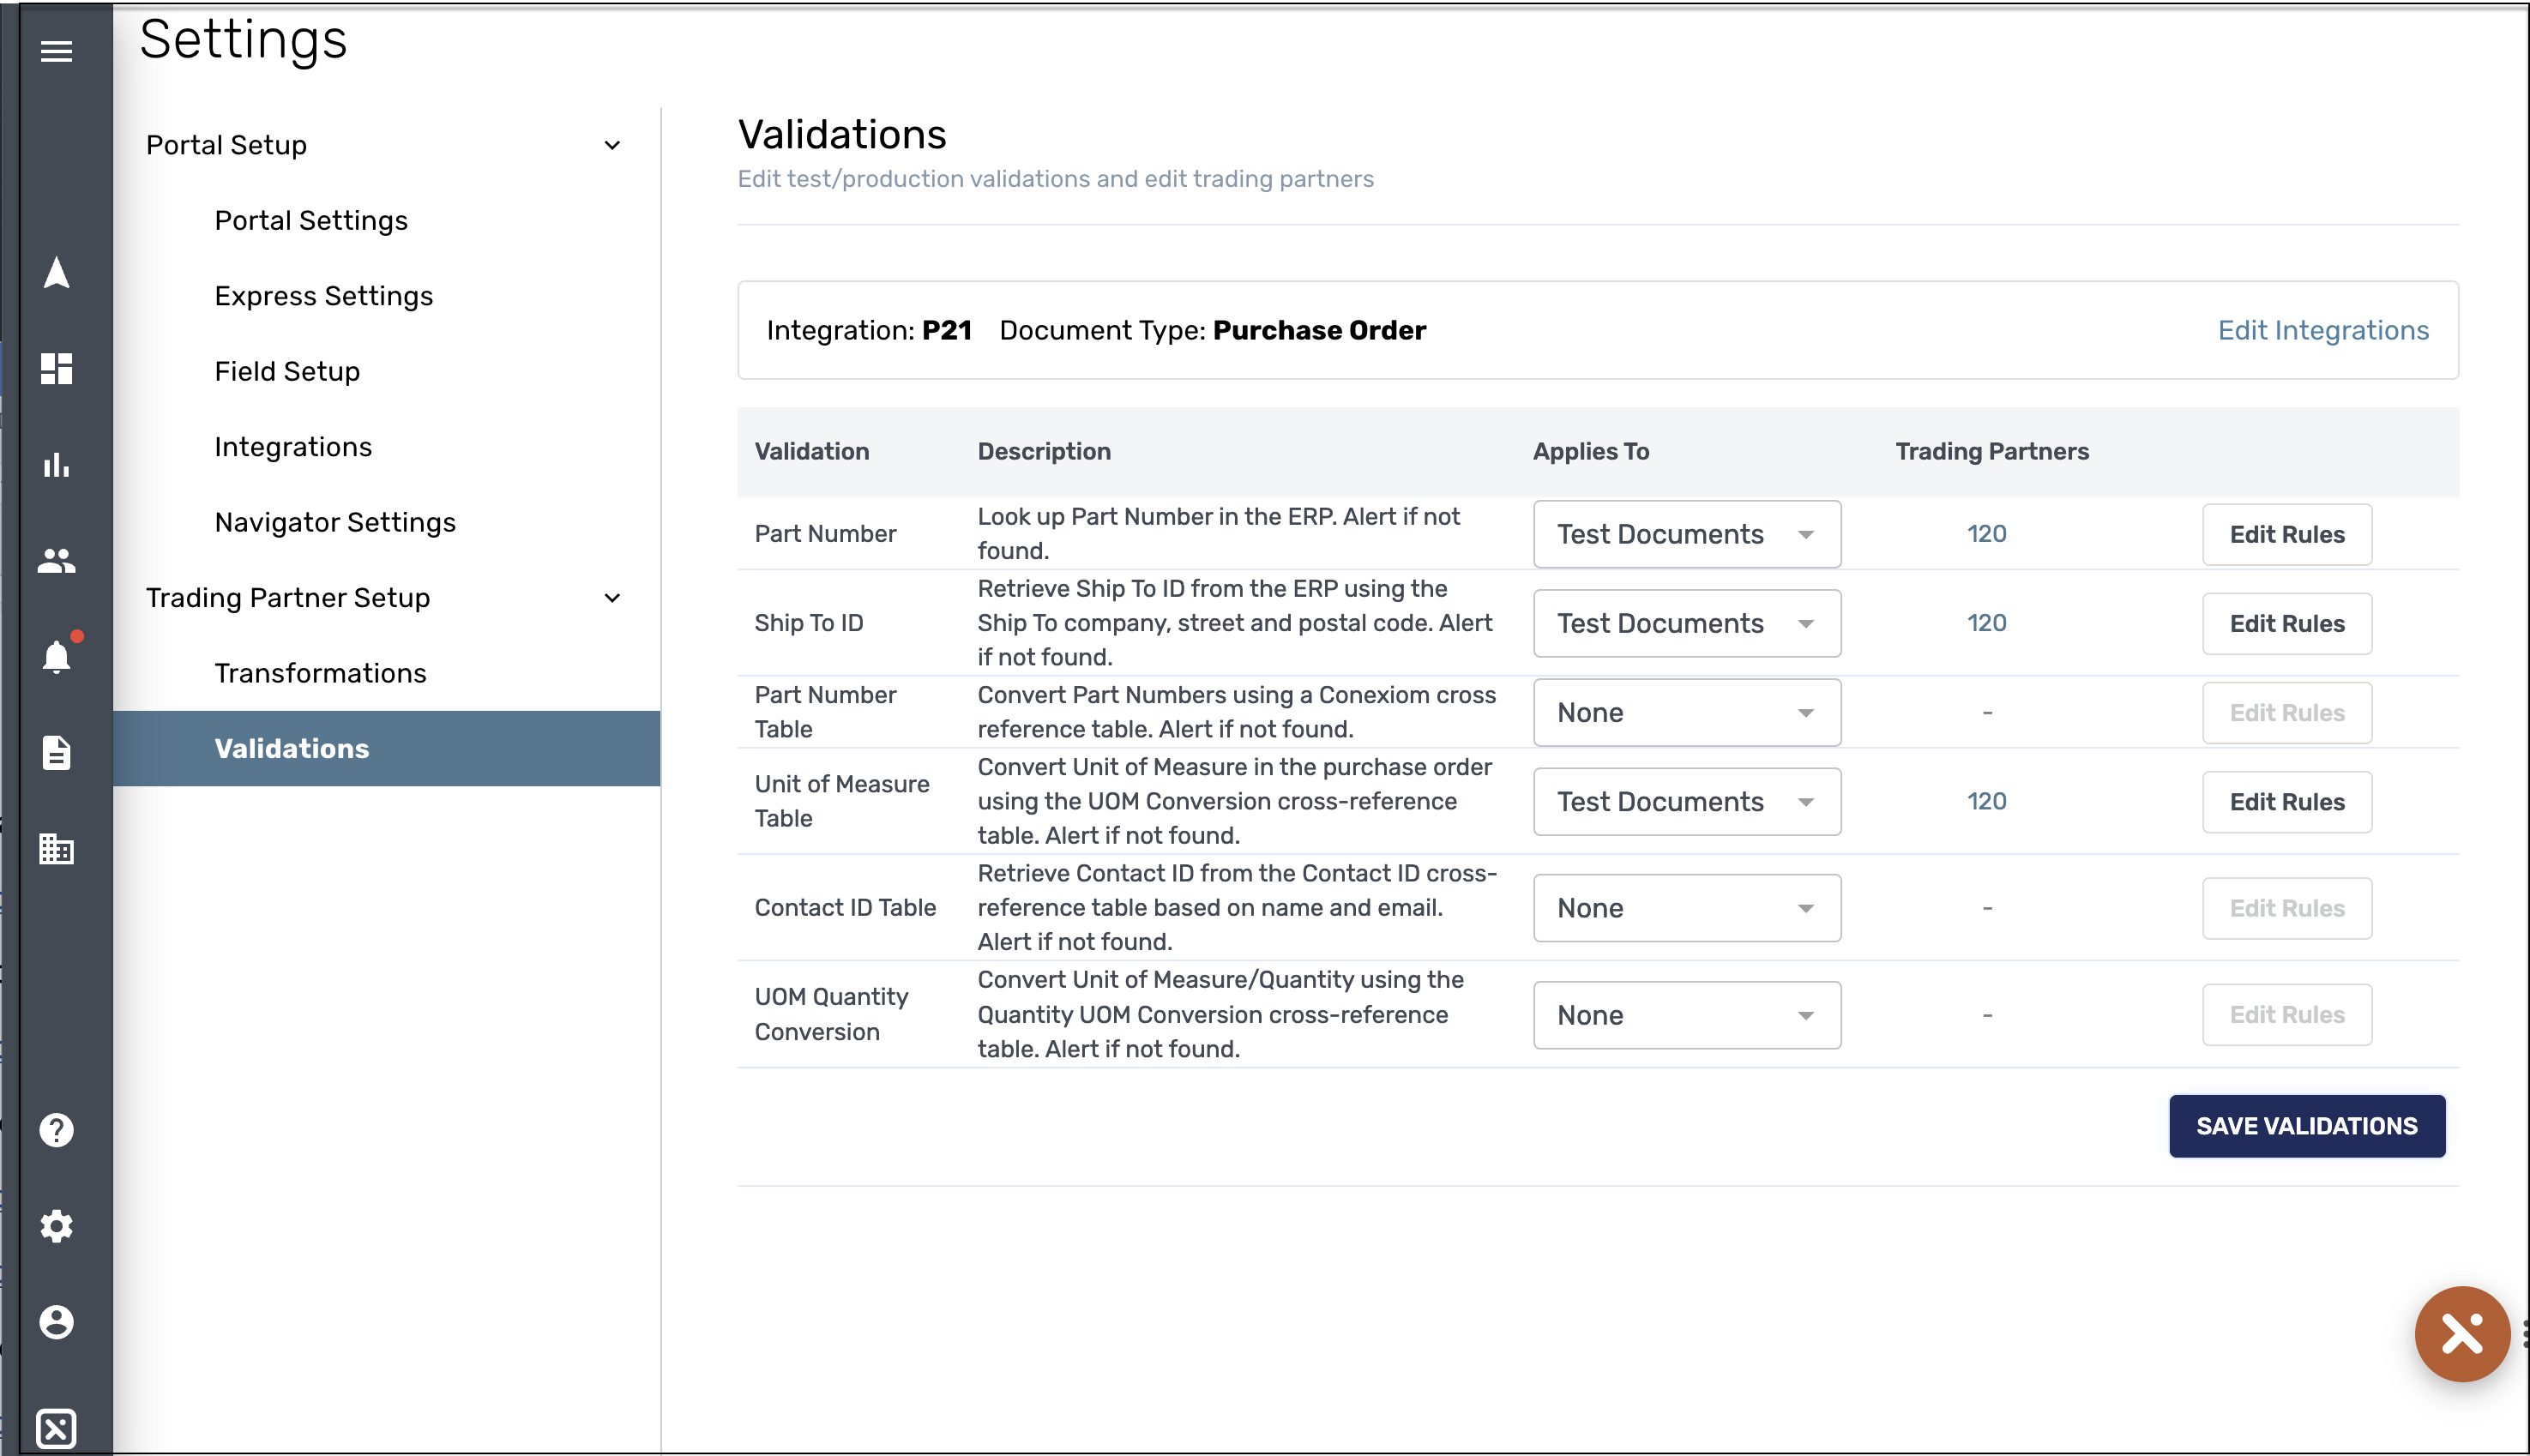
For each ERP and document type, you can enable or disable validation logic statements, like Part Number or Unit or Measure.
-
For each validation listing, in the Applies To column, click the field and from the dropdown menu that displays select Test Documents or All Documents. The setting is then applied.
-
If you are finished with all changes, click Save Validations.
Note: If the validation is not to be used, leave setting at None, the default.
Specifying Trading Partners
You can set validations to include or exclude specific trading partners. To do so, follow these steps:
-
In the listing of the validation, click the number in the Trading Partners column. Listings of each specific trading partner displays with a check box next to each.
-
To remove a trading partner from the selected status, un-check the checkbox.
-
Click Save Trading Partners. The Validations sub-tab main screen resumes.
-
If you are finished with all changes, click Save Validations.
Editing Rules
If a validation displays the Edit Rules button to the right of the listing, you can set additional parameters. For example, Unit Price can be modified for tolerances, based on percentage or dollar amount.
Note: Choices vary, depending on the validation.
To edit rules on applicable validations, follow these steps:
-
Click Edit Rules. The Edit Rules screen displays, listing parameters you can select.
-
Click the toggle switch to turn the rule on or off.
-
Click Save Validation Rules. The Validations sub-tab main screen resumes.
-
If you are finished with all changes, click Save Validations.
Changing the Integration
You can change the ERP Integration you are working with.
Warning: Changing your ERP without appropriate planning can create significant operational problems. Only make changes in consultation with your Conexiom representative.
To change to a different integration, follow these steps:
-
Click Edit Integrations. The Integrations screen displays.
-
Click Connection and from the dropdown menu that displays, select an ERP-integration connection.
-
In each of the fields that display, enter information or select in from dropdown menus. For more information, click .
Note: Fields vary, depending on you choice you make in Step 2. -
Click Environment and from the dropdown menu that displays, select either Sandbox (for testing) or Production (for active records).
-
Click Authentication Type and from the dropdown menu that displays, select the appropriate authentication type.
Note: Selections vary, depending on the selection you make. -
Click Connect. The new choice is now available for you to work with for validations.
-
To work with the new integration you chose, click the Validations sub-tab to return to it.