Part 1: Conexiom Supported Customer Setup
End to end installation of Salesforce App for Conexiom.
Installing Application
Install the latest version of the Conexiom for Salesforce package in your Salesforce Org.
Make sure Email-to-Case is enabled.
Copy the following url and append it to the end of your salesforce url after “.com”: “/packaging/installPackage.apexp?p0=04t5x000000YKbXAAW”
Example: https://login.salesforce.com/packaging/installPackage.apexp?p0=04t5x000000YKbXAAW
Conexiom Integration User
Note: This step is only necessary if the Email-to-Case integration or Case create for Alert generation will be enabled. For more information on email-to-case, review: Using Salesforce Email-to-Case.
In order for conexiom to create or update cases, a Conexiom-integration user must be created for the case integration. We recommend that you create a custom profile and grant API-Only access and as well as the required field-level permissions to Create and Update a case record. To do that, follow these steps:
In Setup, go to Users and then Profiles or Permission Sets.
Create a New Profile or New Permission Set.
Label it clear. For example, “Conexiom Integration User.”
Navigate into System Permissions and check the permissions Apex REST Services and API Enabled. Optionally, check the permission API Only User.

If the Case Object has multiple record types, assign the record type to be edited
Next, go to the Object Permissions, and grant the relevant CRUD and field-level access on Cases and Accounts:
Object Level Permissions Field Level Security Account Read, Edit
Billing Address - Read
Shipping Address - Read
Conexiom ID - Read, Edit
Case Read, Create, Edit
Grant 'Read/Edit' for follwing fields:
Account Name
Status
Subject
Create a New User. For example: “Conexiom Integration User.” Follow these guidelines:
For email, we recommend that you use your email so that you can set the password and manage the user account
Edit the username as desired
Assign the custom Profile you’ve just createdTo save your changes, click Save.
Assign this user the Conexiom Admin User and Conexiom Super User permission sets.
Connected App Configuration
To enable Single-Sign On for users between the Salesforce Application and the Conexiom Partner Portal, you need to create a Salesforce Connected App.
Note: Once the connected app has been created, you will need to provide the consumer key and consumer secret to Conexiom.
Important: Before creation of the Connected App, you need to obtain the callback URL from Conexiom, which is unique to your Conexiom environment.
Use the following instructions to create a new Connected App.:
From the Setup Home page, enter App Manager in the Quick Find box.
Select Apps and then App Manager. The list of apps displays.
Click New Connected App.
Enter Conexiom in the Connected App Name field.
Enter Conexiom in the API Name field.
Enter your email address (as administrator) in the Contact Email field.
Check the Enable OAuth Settings Checkbox.
Enter the following Callback URL: https://portal-na1.cloud.conexiom.com/Partner/login
Select Full Access and Provide Access to Your Data via the Web from the list of OAuth Scopes.
Click Save.
Click Continue.
Locate the Conexiom Connected App. Click View from the drop-down list of actions.
Copy the Consumer Key. This parameter must be shared with Conexiom.
Reveal and copy the Consumer Secret. This parameter must be shared with Conexiom.
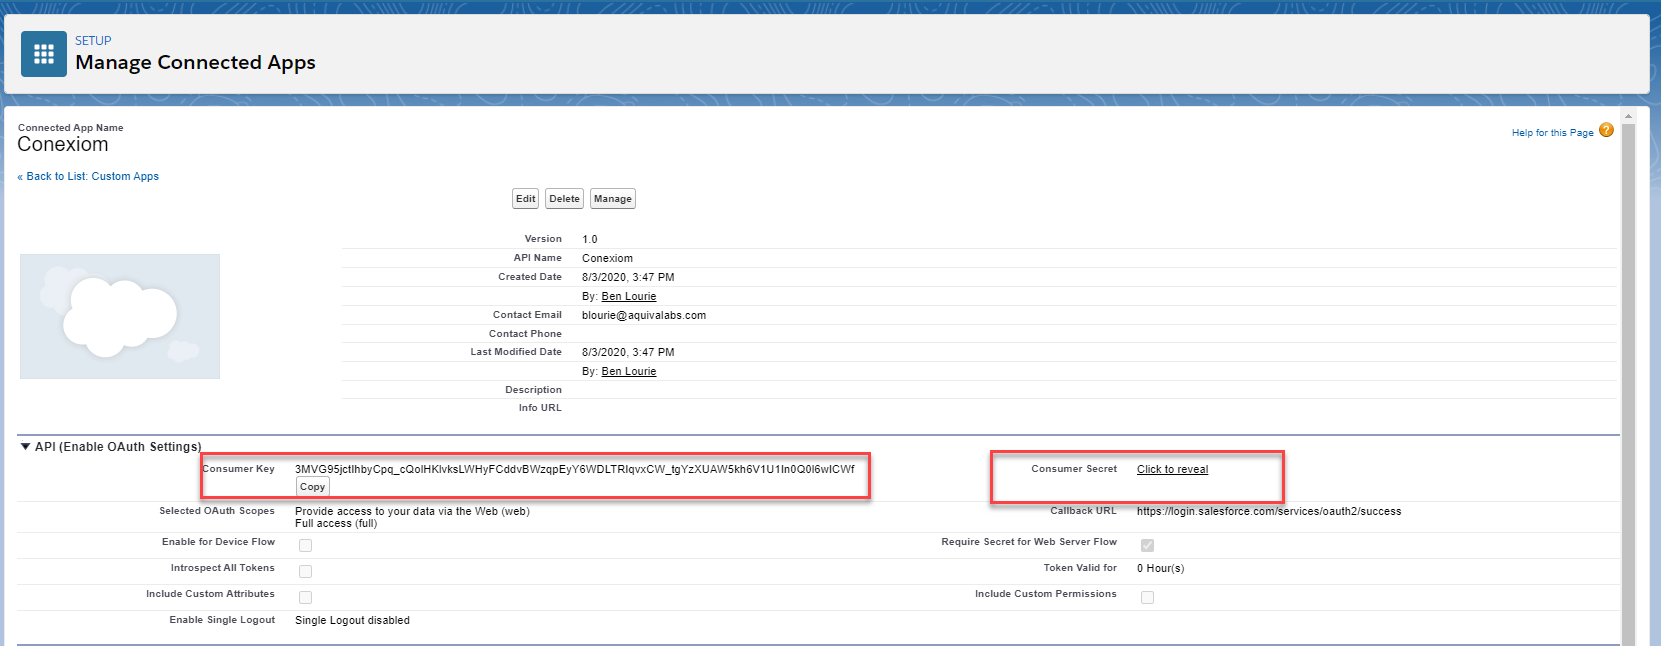
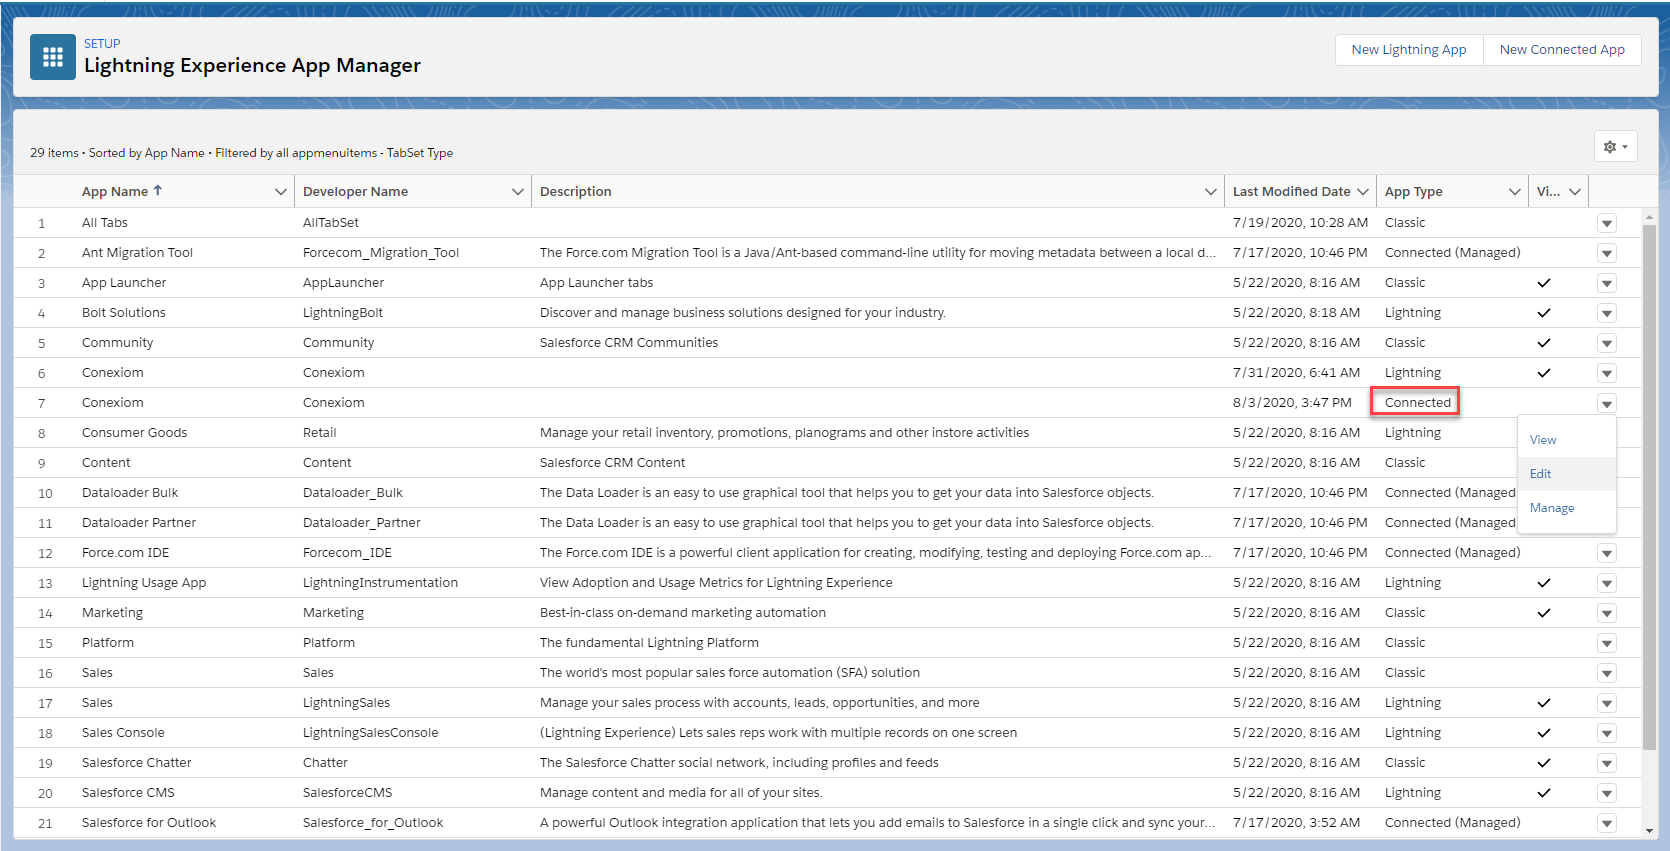

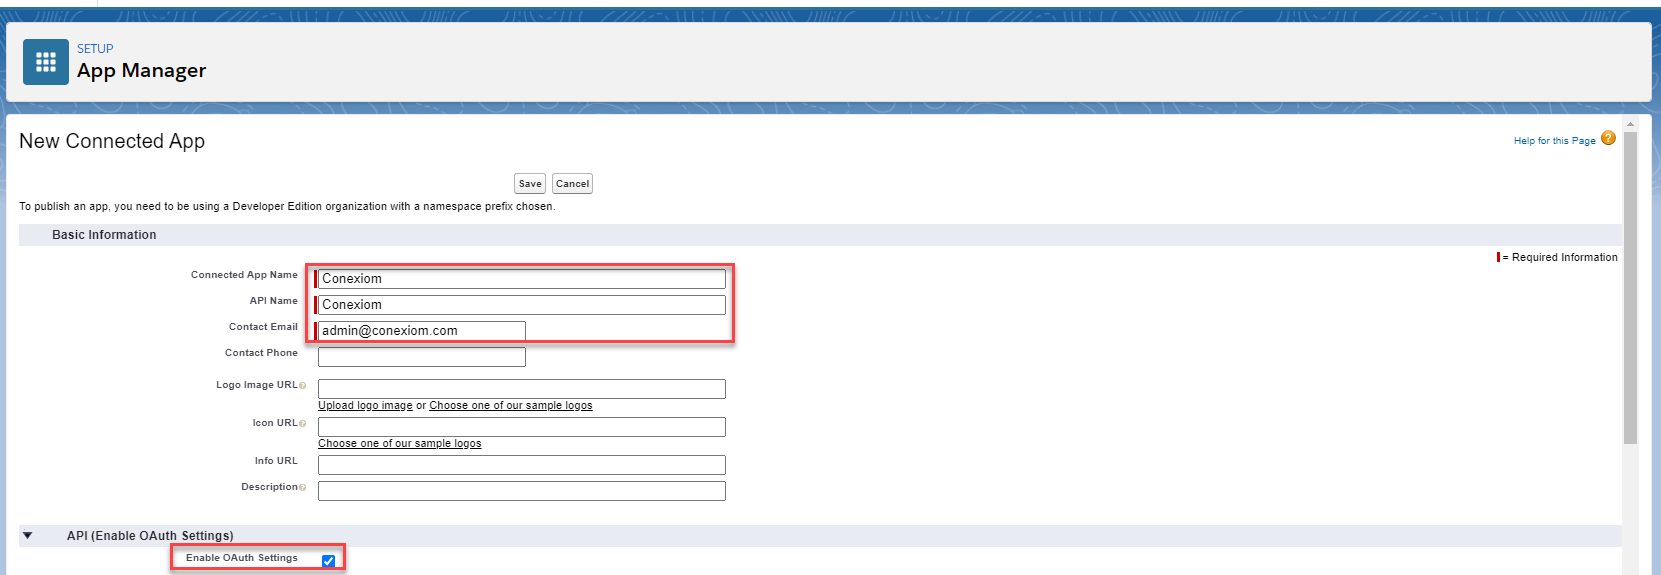

Note: Upon completion of configuring the Connected App, Share the Consumer Key and Consumer Secret with the Conexiom Customer Success team.
Verify API Access is Enabled
To ensure that API access it working correctly, verify that Allow OAuth Username-Password Flows in enabled within your salesforce instance.
Go to Setup and expand the Identity tab.
Select OAuth and Open ID Connect Settings
Ensure Allow OAuth Username-Password Flow is set to On.

Conexiom Permissions Sets
To ensure that only select users have the ability to use the Conexiom application, you need to assign users the appropriate permission sets.
Initially you can do this by selecting the permission set you wish to manage and then assign one or more users. Afterward, you can simply add the permission set when you are setting up a new user. You can also unassign users as needed.
Note: As an Administrator, you must assign the Conexiom SuperUser permission set to yourself before proceeding with severl other setup steps.
Permission Set | Description |
Conexiom Read Only
| This is the most restrictive permission set. This is best for users who need to view but not change Conexiom data. It includes the following capabilities:
|
Conexiom User | This permission set gives users access to functionality that a typical CSR using Conexiom needs. It includes the following capabilities:
|
Conexiom SuperUser | This permission set gives users access to all functionality in the application. It includes the following capabilities:
|
Conexiom Admin User | This permission set gives users access to the configuration of the application. It includes the following capabilities:
By default, the Conexiom Admin User does not grant users access to custom settings and/or many other parts of setup covered in this guide, such as assigning permission sets. Depending on your org’s settings, these pages are likely only accessible to admins. |
To view a more complete guide on the Conexiom permission sets, please reach out to your Conexiom representative.
Creating Visibility Permission Set
To ensure the application functions correctly, you need to set permissions on standard objects. They are summarized below.
Object | Object Level Permissions |
Account | Read, Edit |
Case | Read, Create, Edit |
If you choose to map other fields for these objects, these field level security settings must apply to them as well.
If any of your Conexiom users lack the above permissions, you must create one additional permission set and assign it to those users. If all of your users who use Conexiom in Salesforce already have these levels of access, you can skip this step.
Follow these instructions:
Login to Salesforce as an Administrator.
From the Setup Home page, enter Permission Sets in the Quick Find box.
Select Users > Permission Sets. The Permission Sets list displays.
Click New.
Enter Minimum Permissions for Conexiom in the Label field.
Click Save. The permission set displays.
Click Object Settings.
Select Accounts from the list of objects. The list of Object and Field Permissions displays.
Click Edit.
Select Read and Edit as Enabled.
Click Save.

If you are not using Service Cloud for alerts, you can stop here. If you are, you must configure the following settings as well.
Select Cases from the list of objects. The list of Object and Field Permissions displays.
Click Edit.
For Tab Settings check both Available and Visible.
Select Read, Create, Edit as Enabled.
Click Save.
Assigning Conexiom Permission Sets to Existing Users
To assign one or more users to a permission set, follow these steps:
Log in to Salesforce as an Administrator.
From the Setup Home page, enter Permission Sets in the Quick Find box.
Select Users > Permission Sets. The Permission Sets list displays.
Click the permission set you wish to manage.
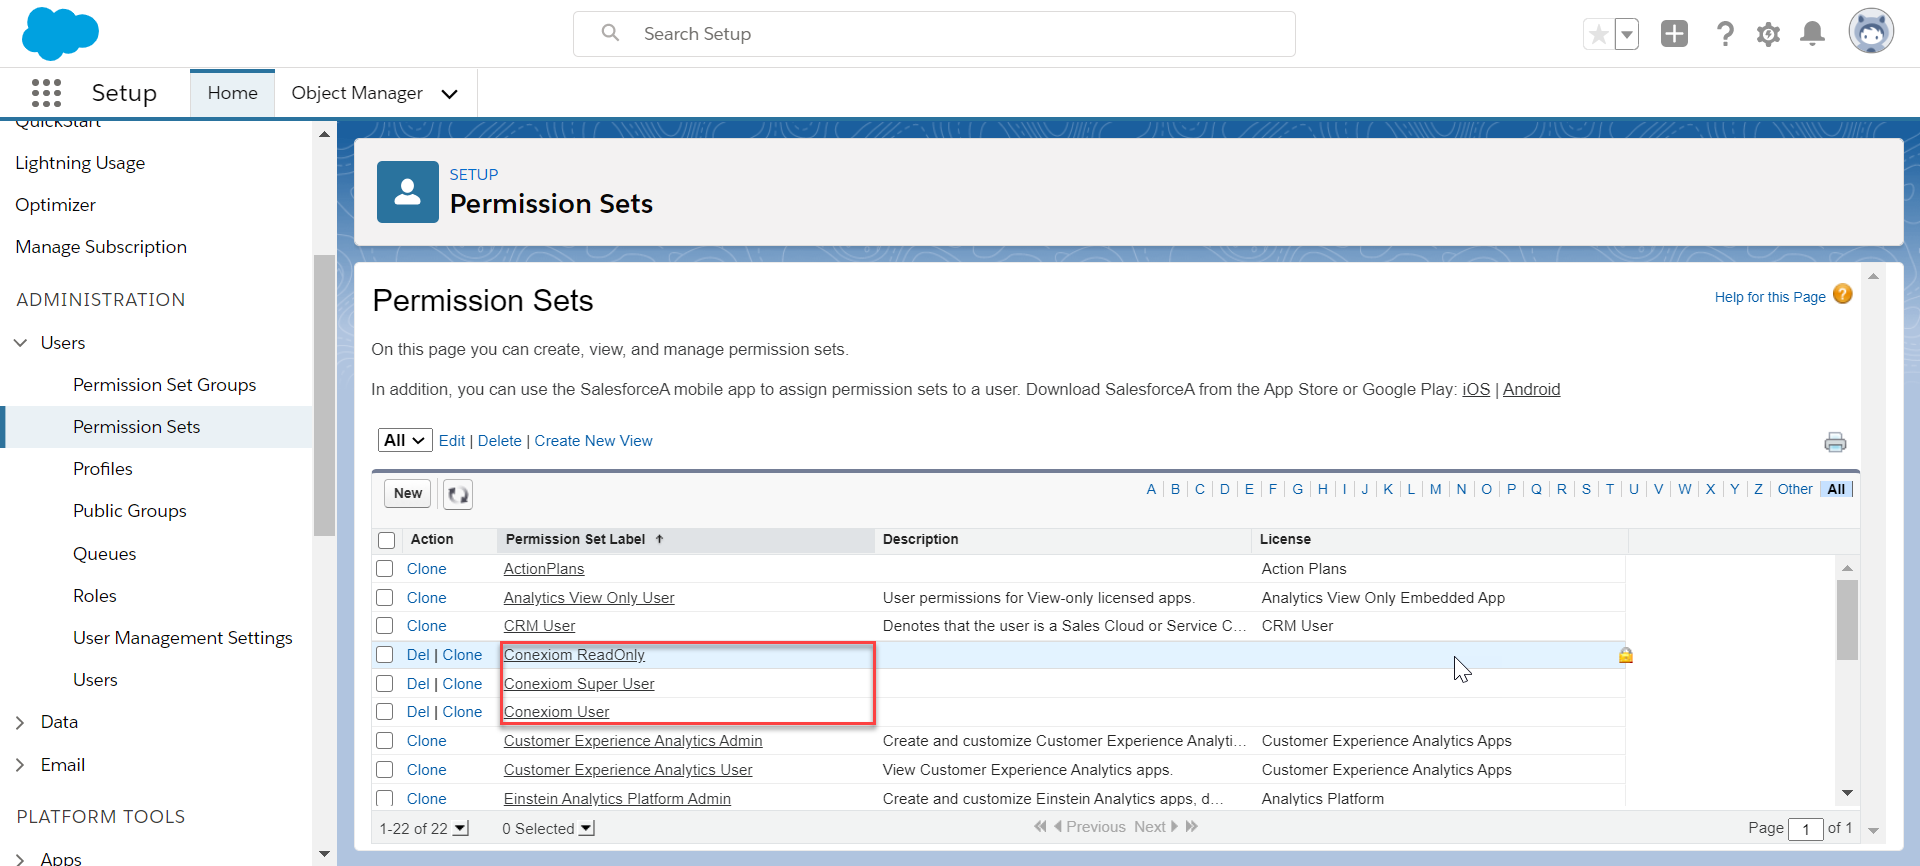
Note: Statr with Conexiom Admin User during initial configuration, as this is the permission set needed as an administrator.
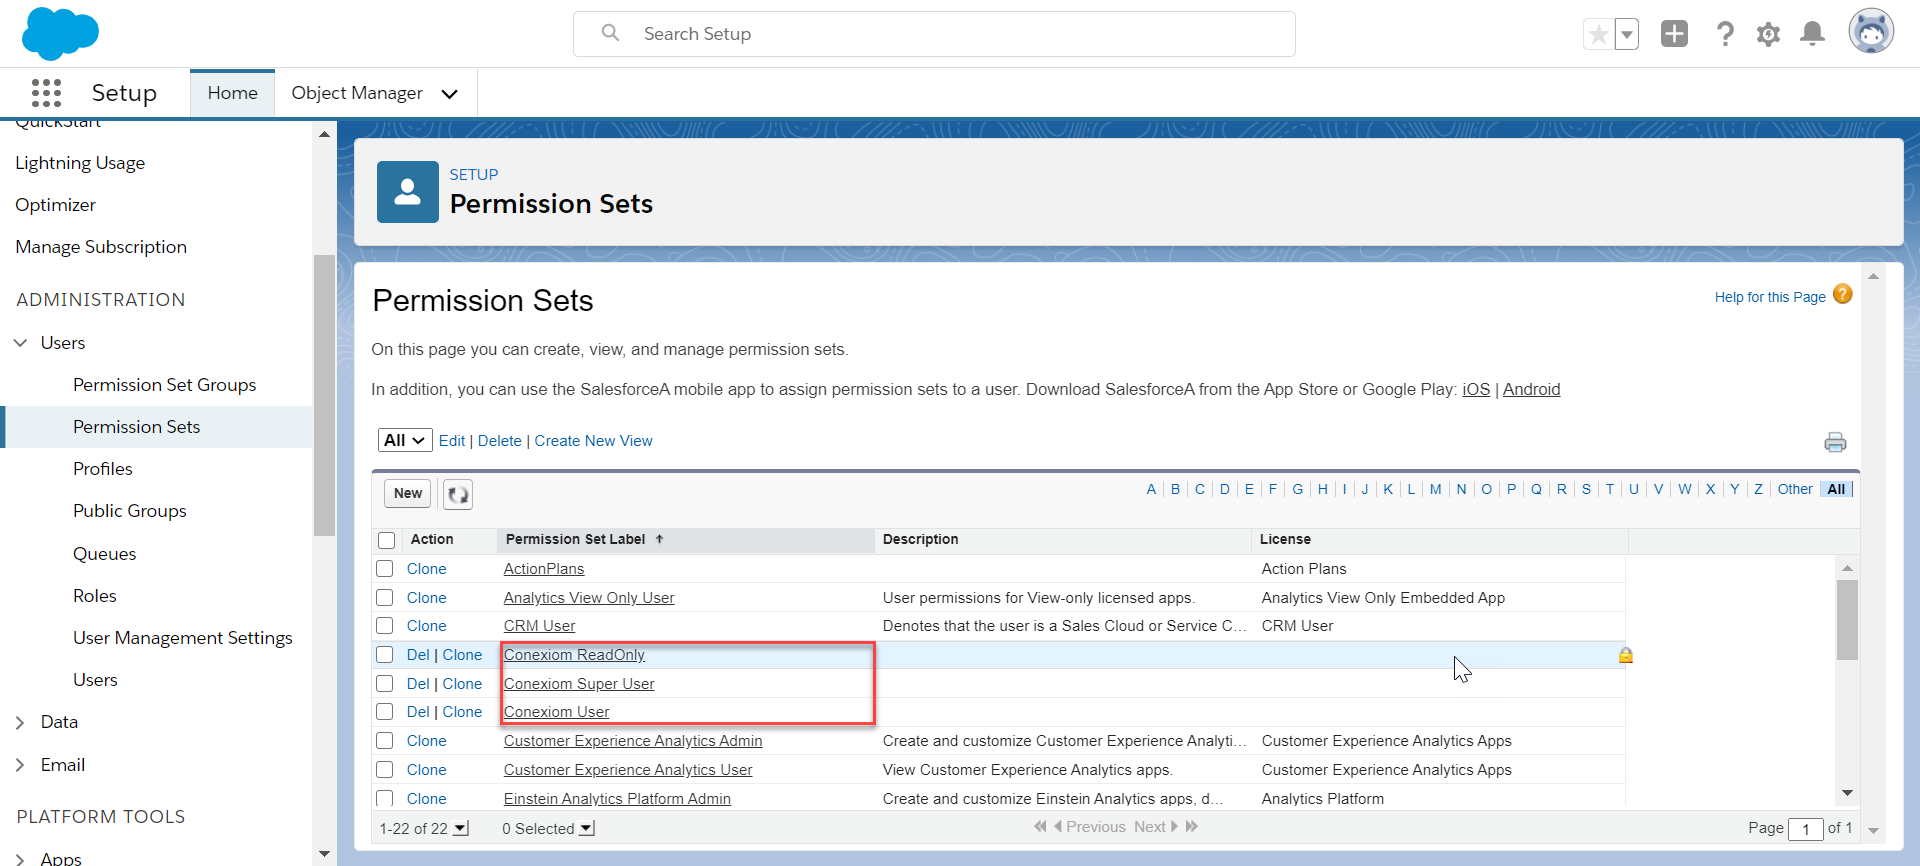
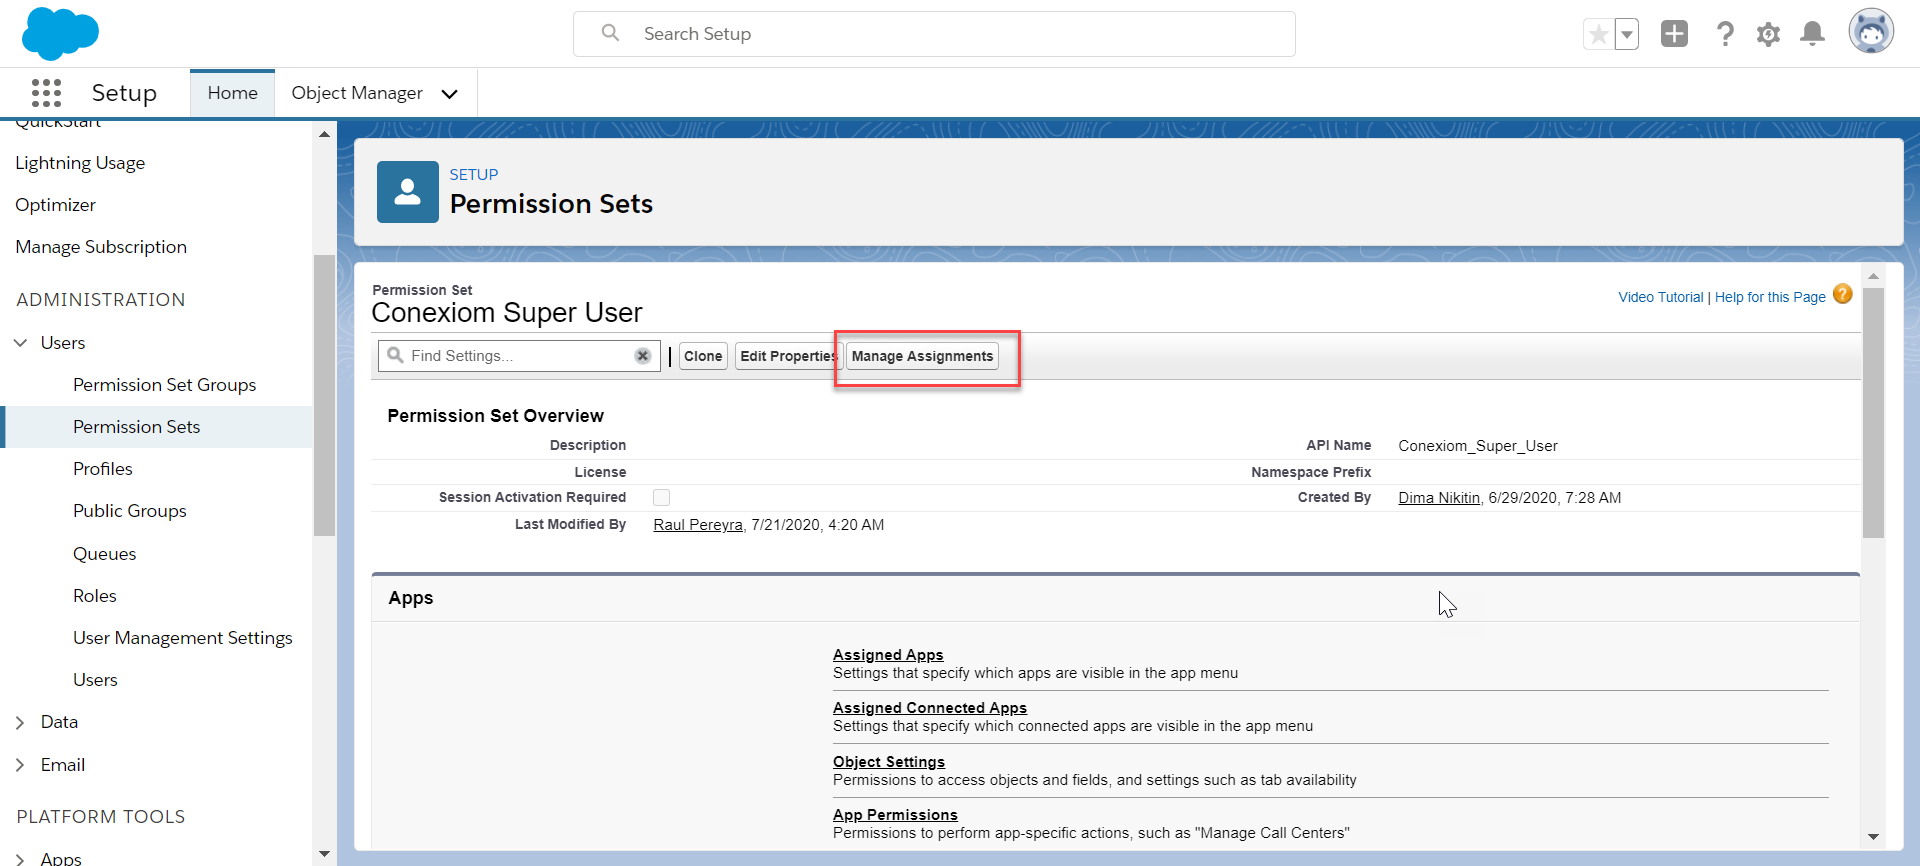
Click Add Assignments. A list of users displays.
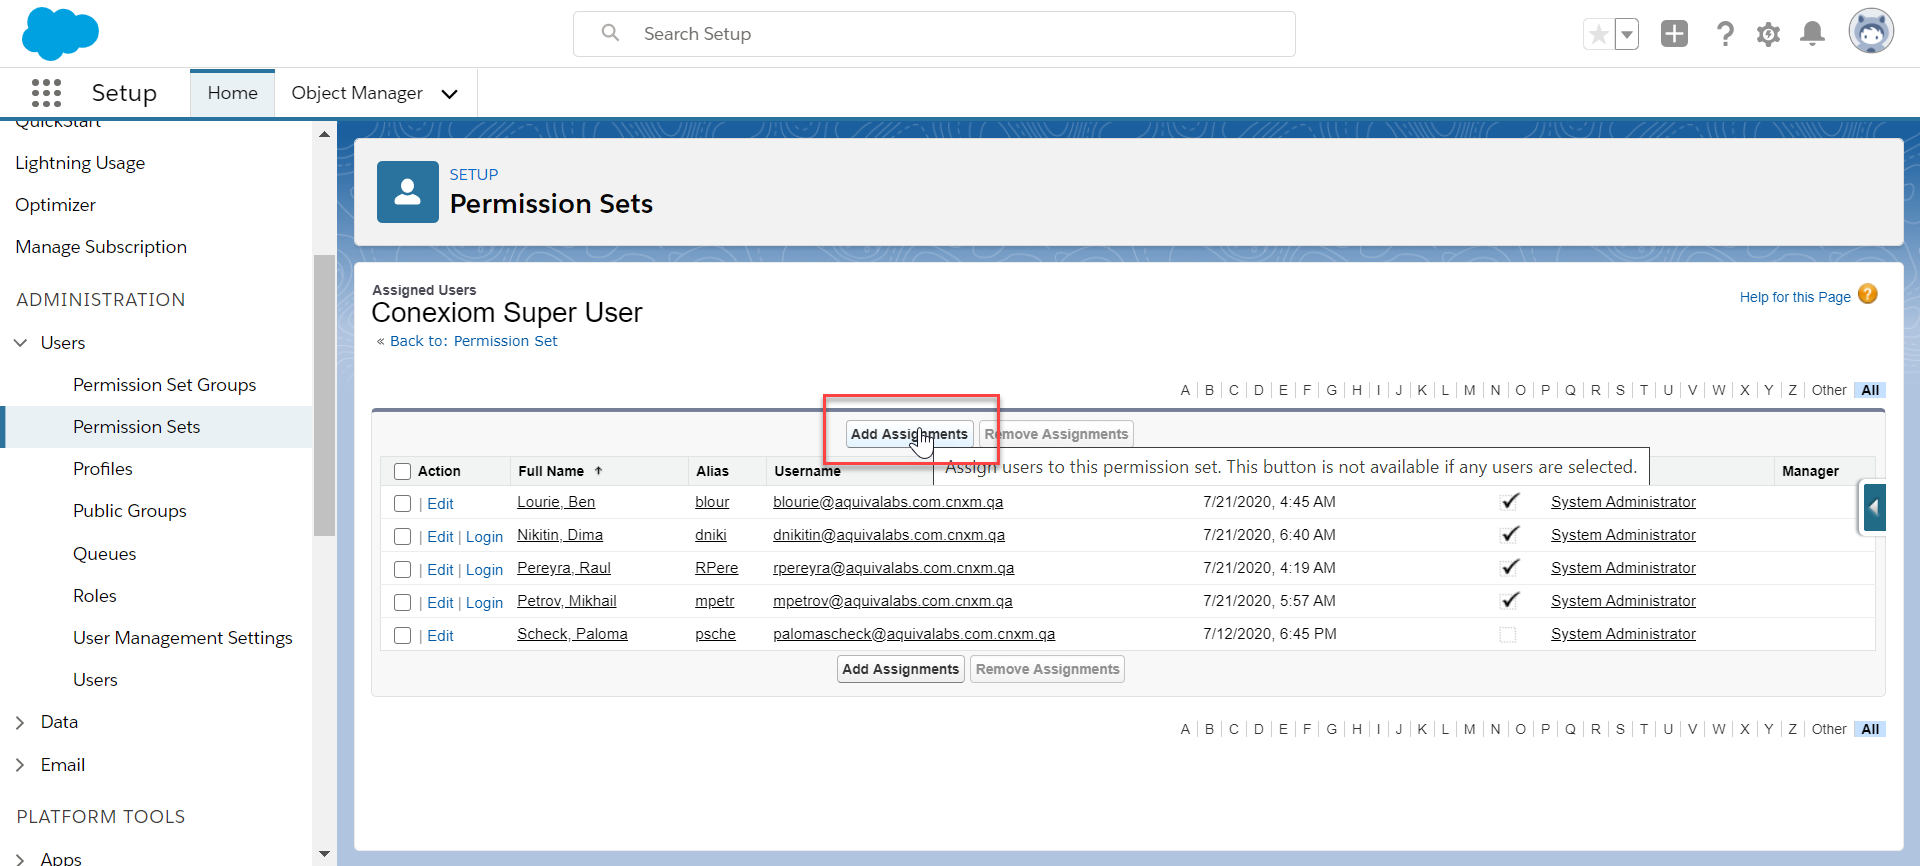
Select one or more users from the list.
Click Assign. A page displays that confirms which users to whom the permission set was successfully assigned.
Click Done.
Repeat steps 4-9 for each Conexiom permission set.
Repeat steps 4-9 to assign the Minimum Permissions for Conexiom permission set to users who do not have the minimum access requirements for the application.
Assigning Permission Sets to New Users
After the initial setup of a new user is complete, you can immediately assign permissions sets.
To set Permission Set assignments, follow these steps:
From the User page, select the Permission Set Assignments related list.
Click Edit Assignments.
Under Available Permission Sets, select a permission set and then click Add.
Click Save.
Email Conexiom Support
Email Conexiom support to request the setup file.
You can copy and paste the below email template into the body of your email to support. Be sure to indicate if you will be enabling the Email-to-Case integration on the Conexiom for Salesforce Application.
Once you have received the information back from Conexiom, continue with the next install step:
Region | Support Email |
US & Canada | |
EMEA | |
Asia Pacific |
Email Template
Subject: Conexiom for Salesforce App
Body: Hello, I have installed the Conexiom Salesforce application. Please share the setup file required to establish OAuth connectivity. I WILL/WILL NOT be enabling the Email-to-Case feature. This is a Sandbox/Production Environment.
For the Email-to-Case feature, here are the credentials for the Conexiom Integration user:
Username
Password
Security Token
Consumer Key
Consumer Secret
Note: If preferred, the credentials and Consumer Key and Secret can be shared over a live call rather than email.
You will need Conexiom to provide the setup file before you can proceed with the setup steps to connect to Conexiom.
.png)